Templates and Single Scenes explained
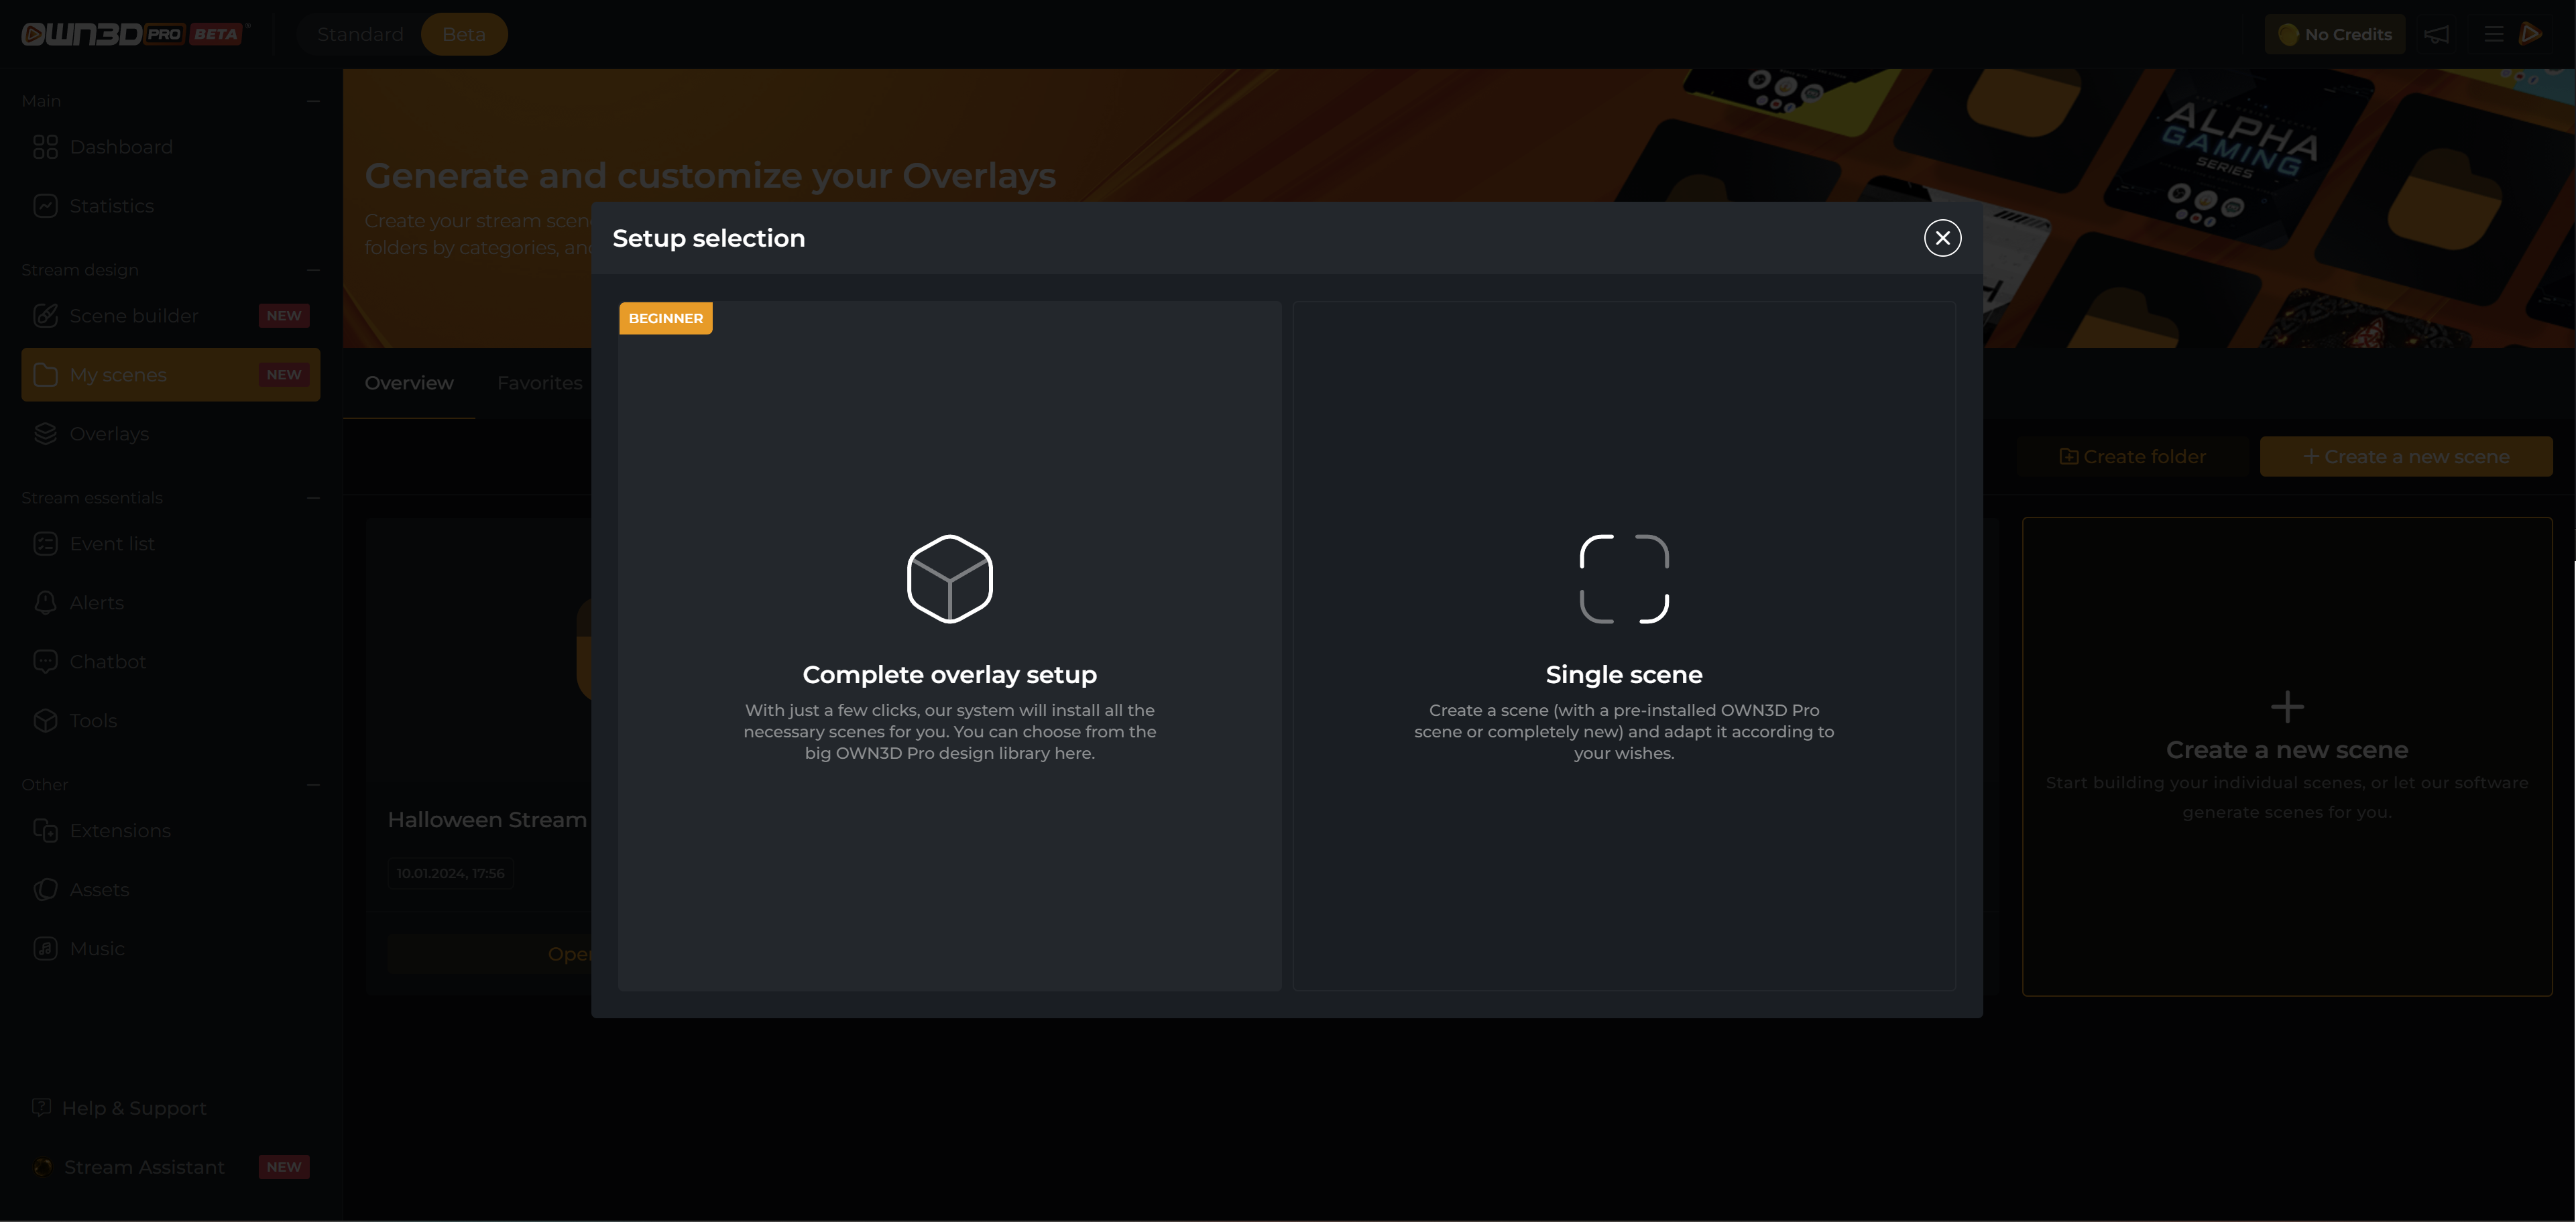
OWN3D Pro offers you several ways to create your stream overlay with the Scene Builder: "Complete Overlay Setup" and "Single Scene". The Complete Overlay Setup is based on pre-made template packs and allows you a quick start, including all the scenes you need for streaming. Single Scene enables you to create individual scenes as desired. This way, you can create your overlay from scratch or with individual templates.
Templates
If you want to get started quickly with your new stream overlay, our preset template packs take the work off your hands. With the templates, you can create overlays in a few seconds and with just a few clicks! Simply choose from free templates or, as a Pro subscriber, from many template designs, and we do the rest.
Once you have decided on the automatic or manual selection and a design, a folder with your scenes will be created, which you can edit.
After creating the scene, edit your name for the social media channels or the overlay if you want to make changes. Finally, you just need to insert the individual scenes as a browser source into your broadcasting tool.
Here, we will show you the different selections.
Automatic Selection
Manual Selection
Prefer learning through videos? Take a look!
Single Scenes
If you want to work on your scenes in more detail from the beginning, you can start with individual scenes. You can choose individual templates or start with a blank scene, jump directly into the Scene Builder, and build your own overlay from graphics and widgets.
Want a video tutorial? Click here:
The Scene Builder - a playground for streamers
The basics of an empty scene
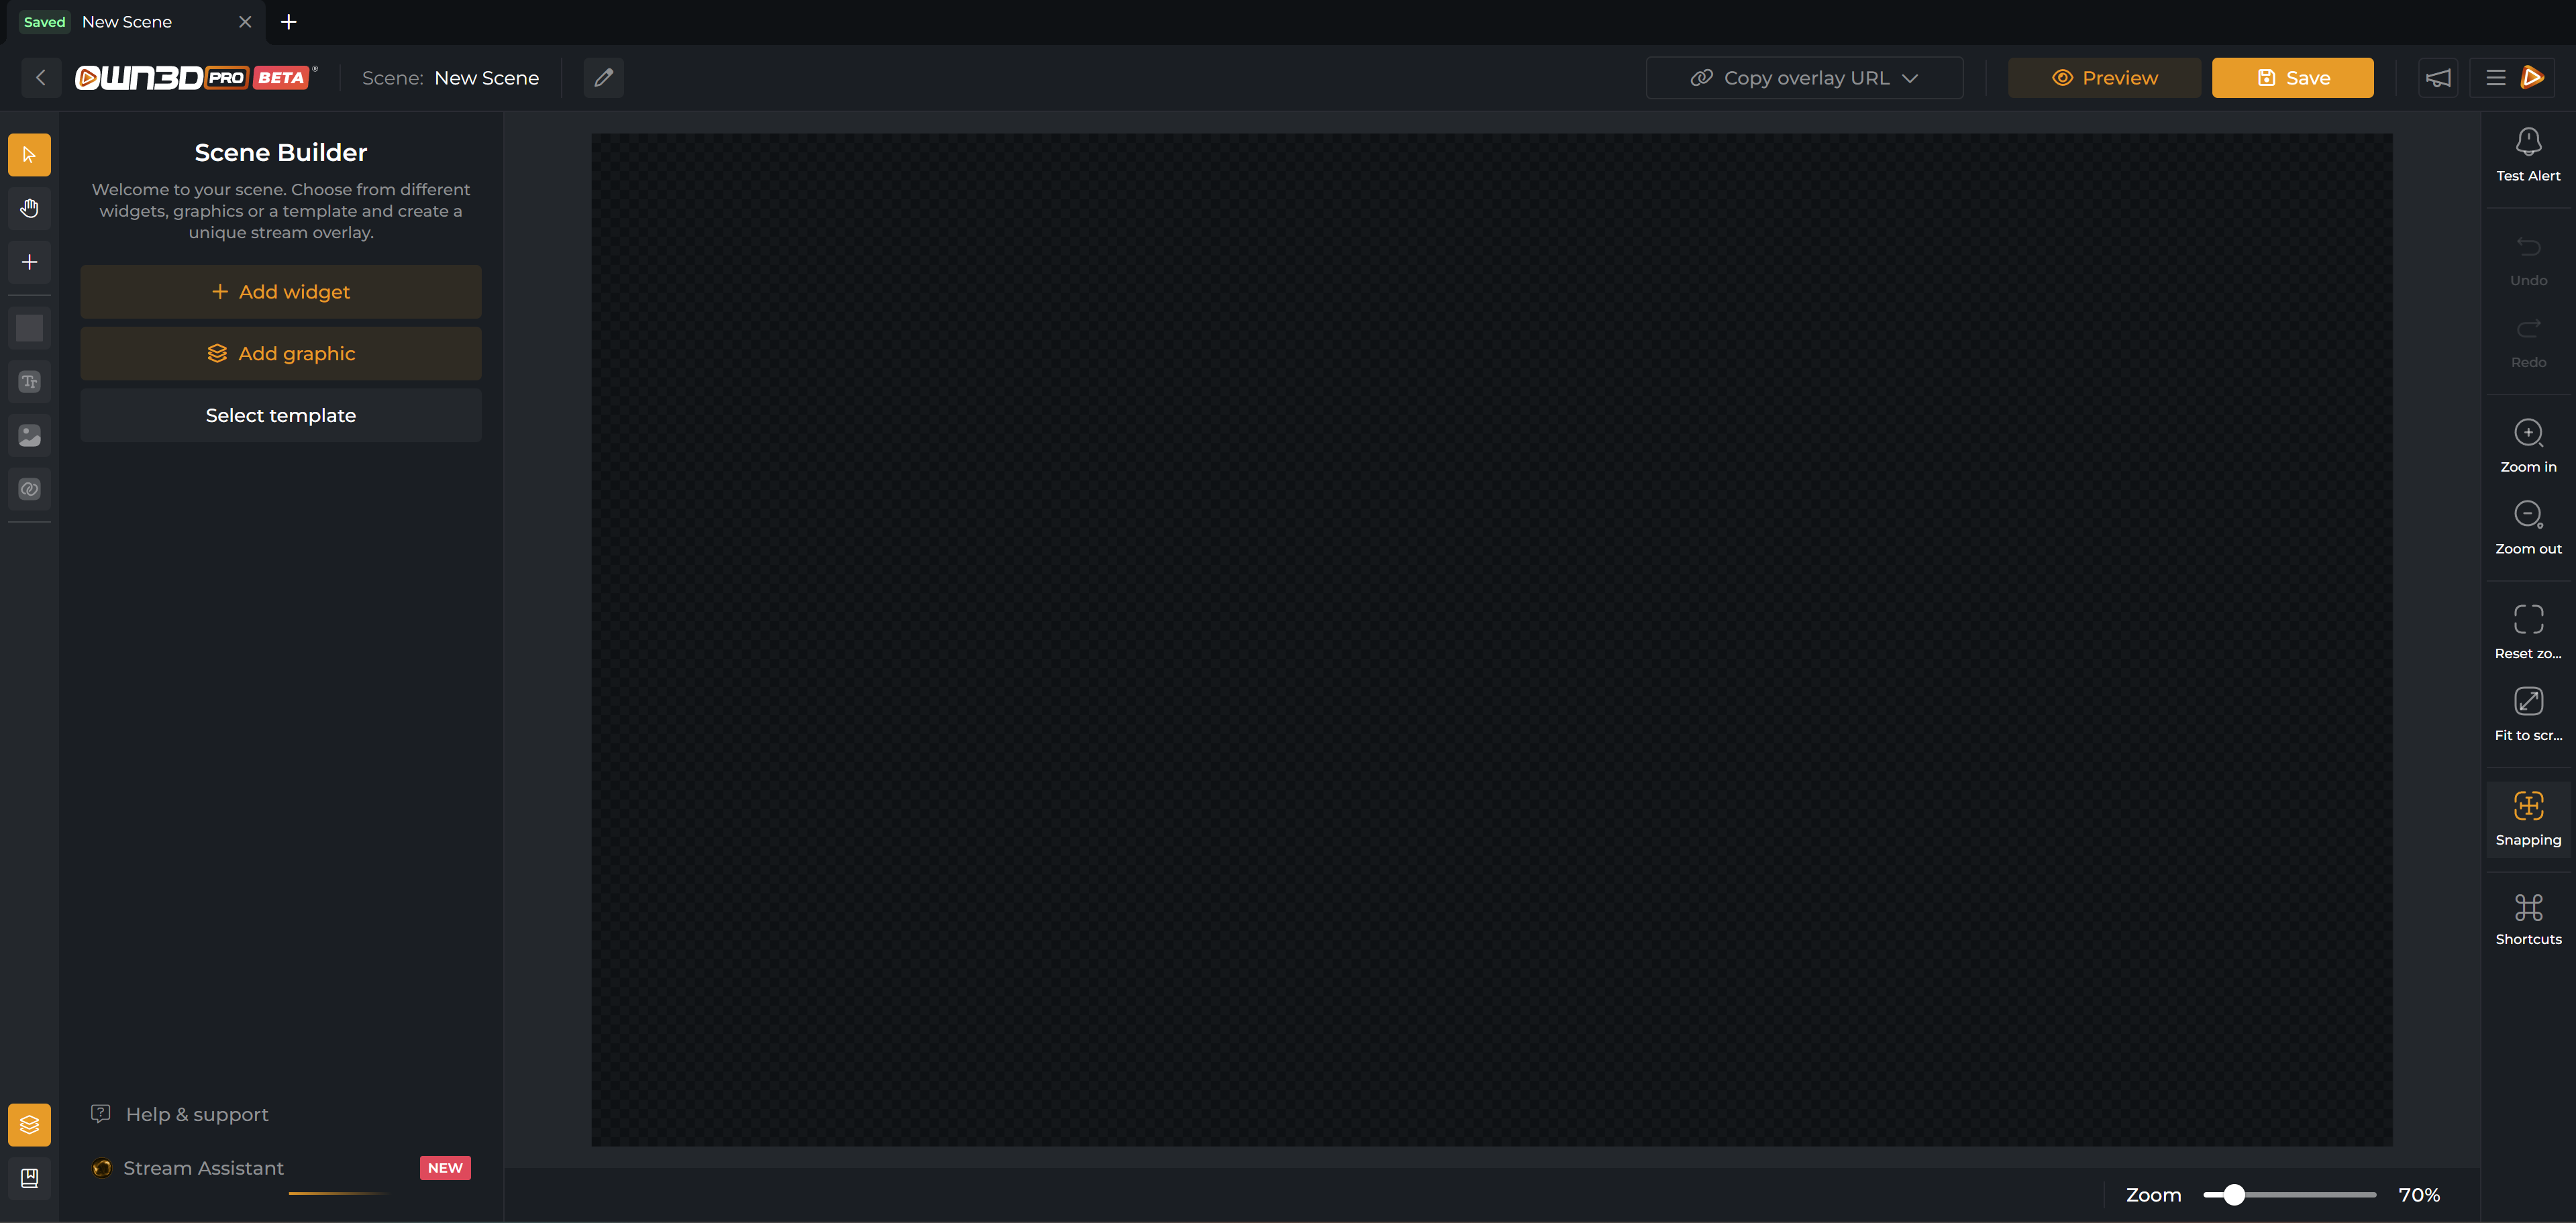
You can design your own stream overlay from scratch in a blank scene and get creative.
Under "Add Widget," you can add practical elements like Countdown, GIFs, Twitch Chatbox, images, your own videos, labels, and more.
Additionally, under "Add Graphic," a comprehensive library with various designs is available to you, from which you can create your individual overlay. Here, you'll find stream graphics for the webcam, talking banners, various overlays, social icons, intermission banners, and much more. There are some free stream assets available to you. However, if you desire more, you can choose from hundreds of graphics with the Pro Subscription.
If you prefer to work with a pre-made template, you can simply click "Select Template" in the menu. There are five free stream designs and an extensive library for Pro subscribers. You can try everything out, and if you like what you see, you can upgrade to a Pro subscription at any time and choose from an even more extensive selection of assets.
In the top menu bar, you can name your scene, find the browser source link of your overlay, access the preview of your overlay, and save it. You will find a few more useful functions for the Scene Builder in the right menu. We will explain here how you can quickly and easily insert the browser sources into OBS.
The basics of templates
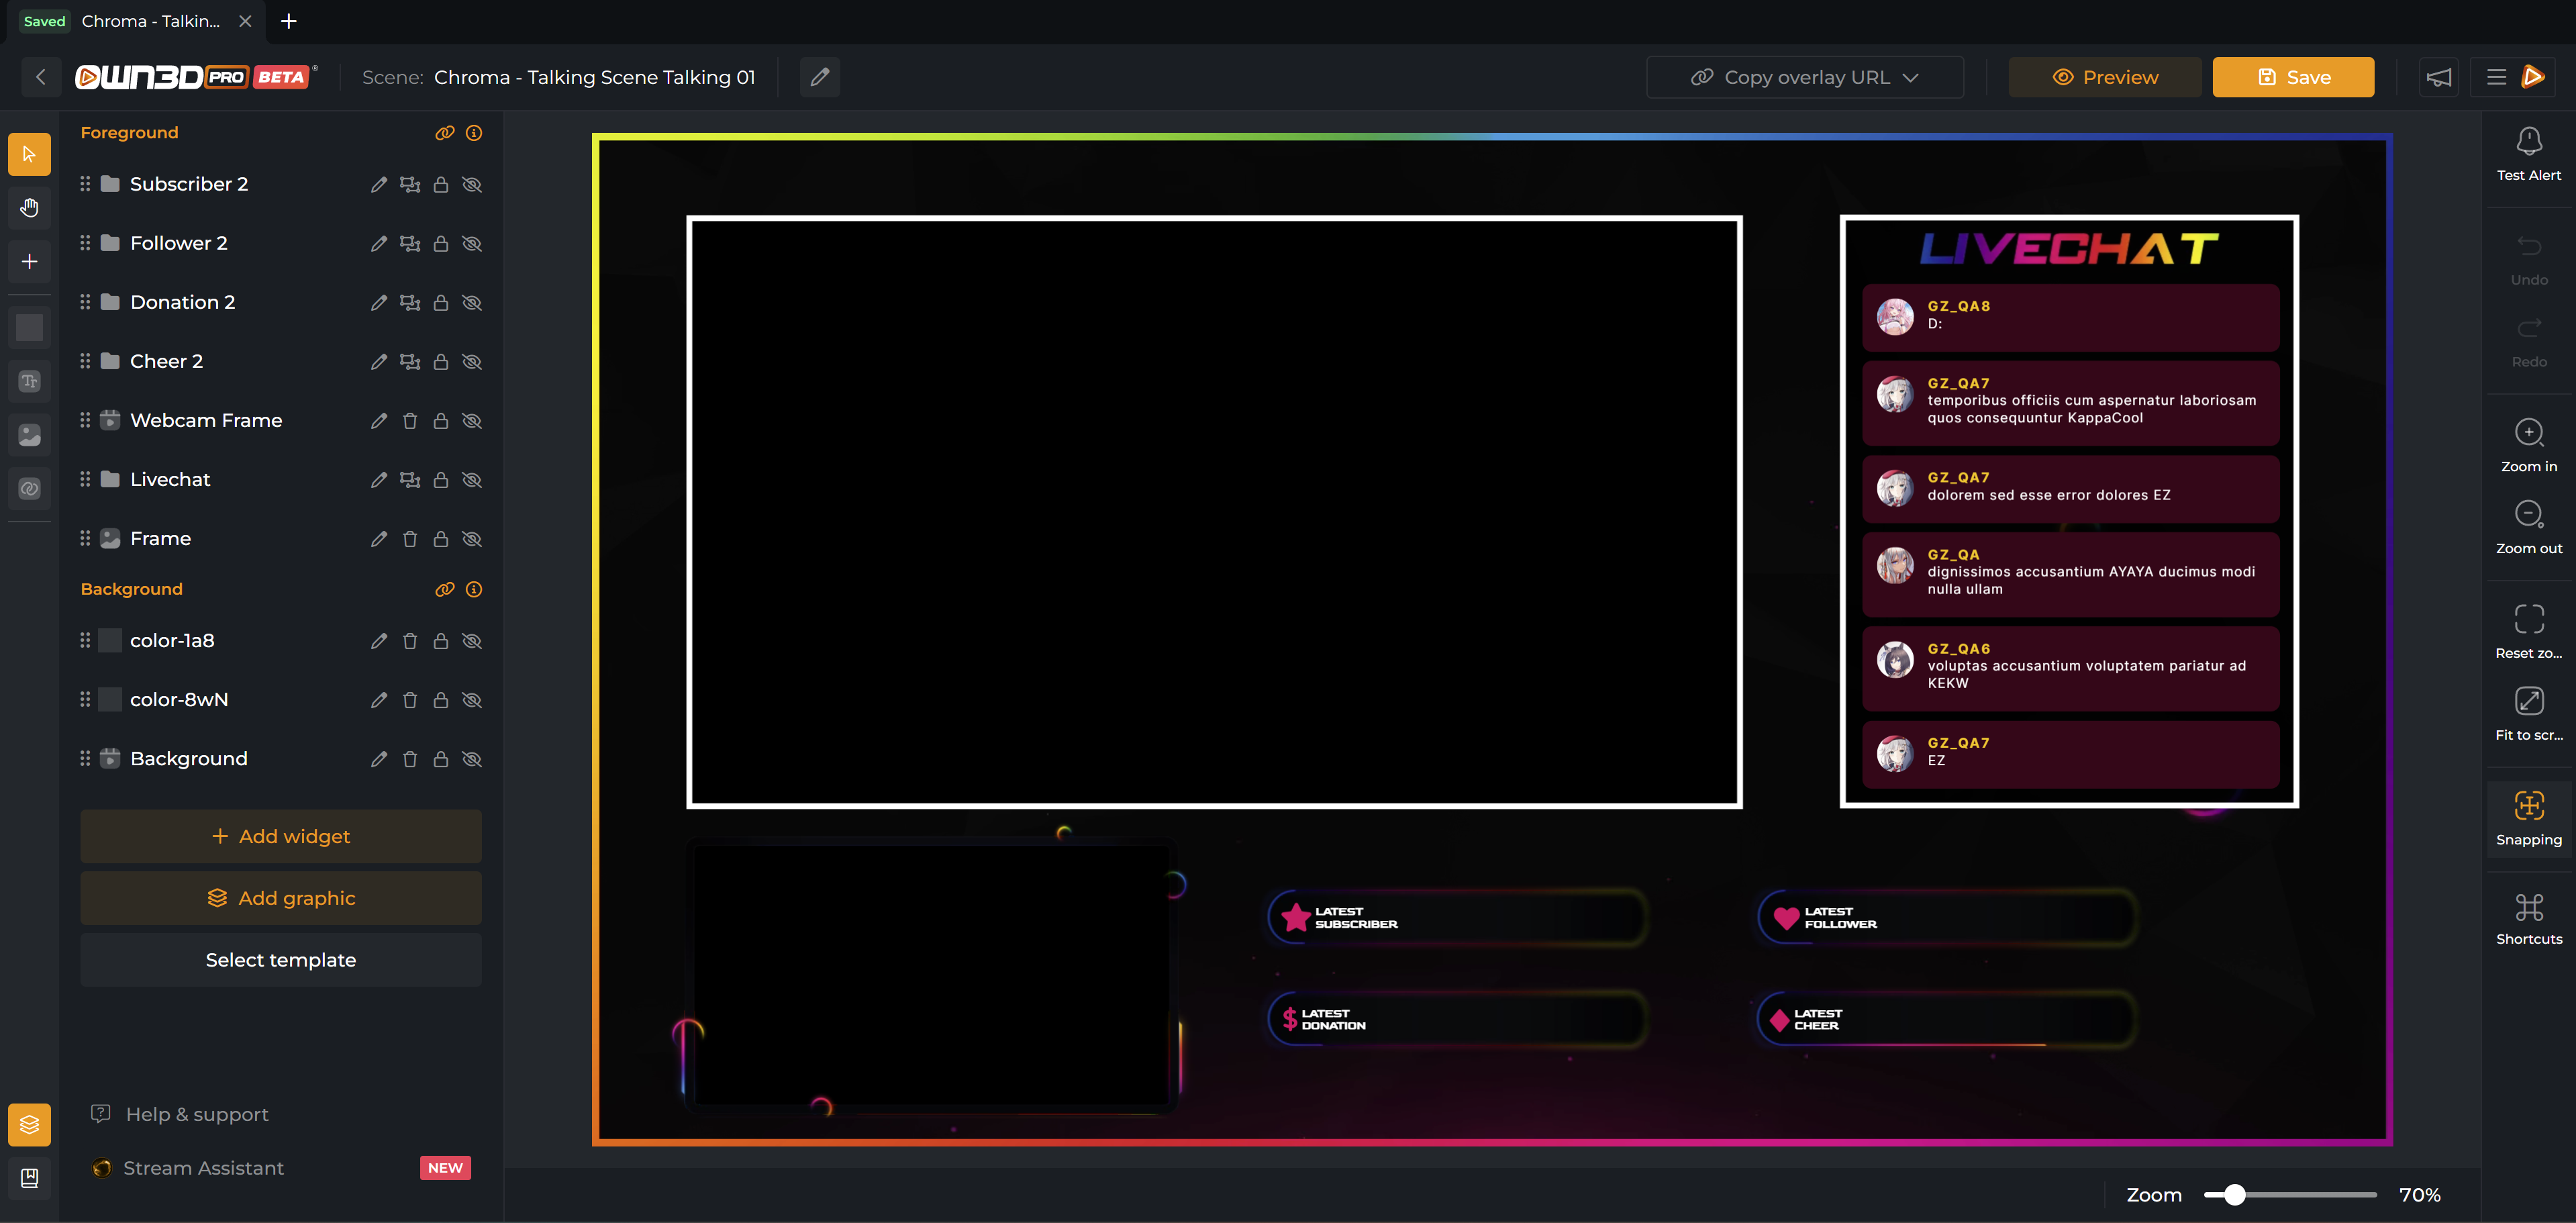
In a scene with a pre-installed OWN3D template, you will find all predefined elements that belong to the template on the left side.
These elements are customizable, and you have the opportunity to edit them according to your ideas. With filters, you can change colors or add a blur. You can change the position of the elements, edit text elements, adjust the size, insert or remove widgets, show or hide elements, and much more.
Grouping elements, such as social media elements, is also practical. Within a group, you can edit each element individually, but the grouping allows you to move all elements simultaneously. This simplifies the adjustment and prevents you from moving each element individually, making the design consistent and user-friendly.
Element arrangement in your scene
Once you have incorporated the first elements, such as graphics or widgets, you will see them listed on the left side of the page. It is essential to know the following: All elements at the top are in the foreground. Those elements that are at the bottom are in the background.
The ordering of the elements is essential, similar to in OBS Studio. So keep in mind: If you have a social media design, you must ensure the design element is below the text element. Otherwise, the design element will cover the text.
Think of the arrangement like a sandwich: At the very bottom is the bread - the background. If you now put cheese or lettuce (other elements) on it, they cover the bread, which is only slightly visible in the background.
You can, of course, rearrange the elements at any time by clicking and dragging them with the left mouse button.
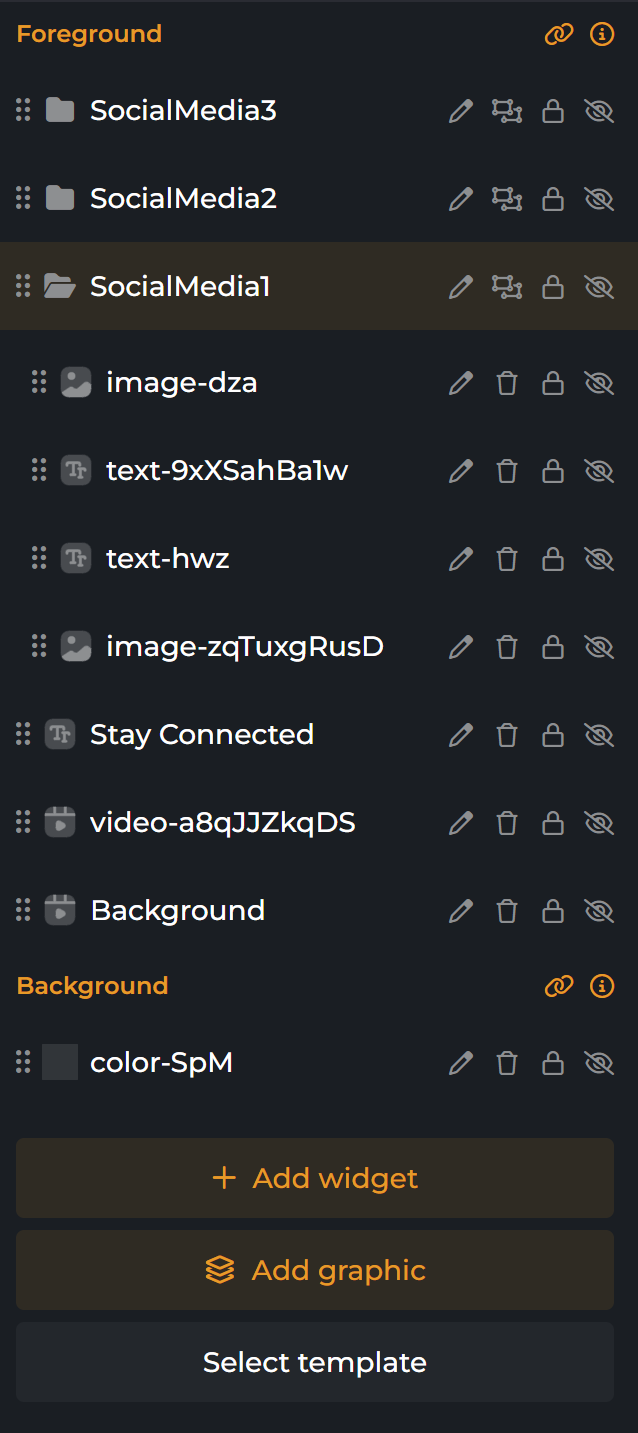
Learn more about fore- & background:
Edit templates and scenes
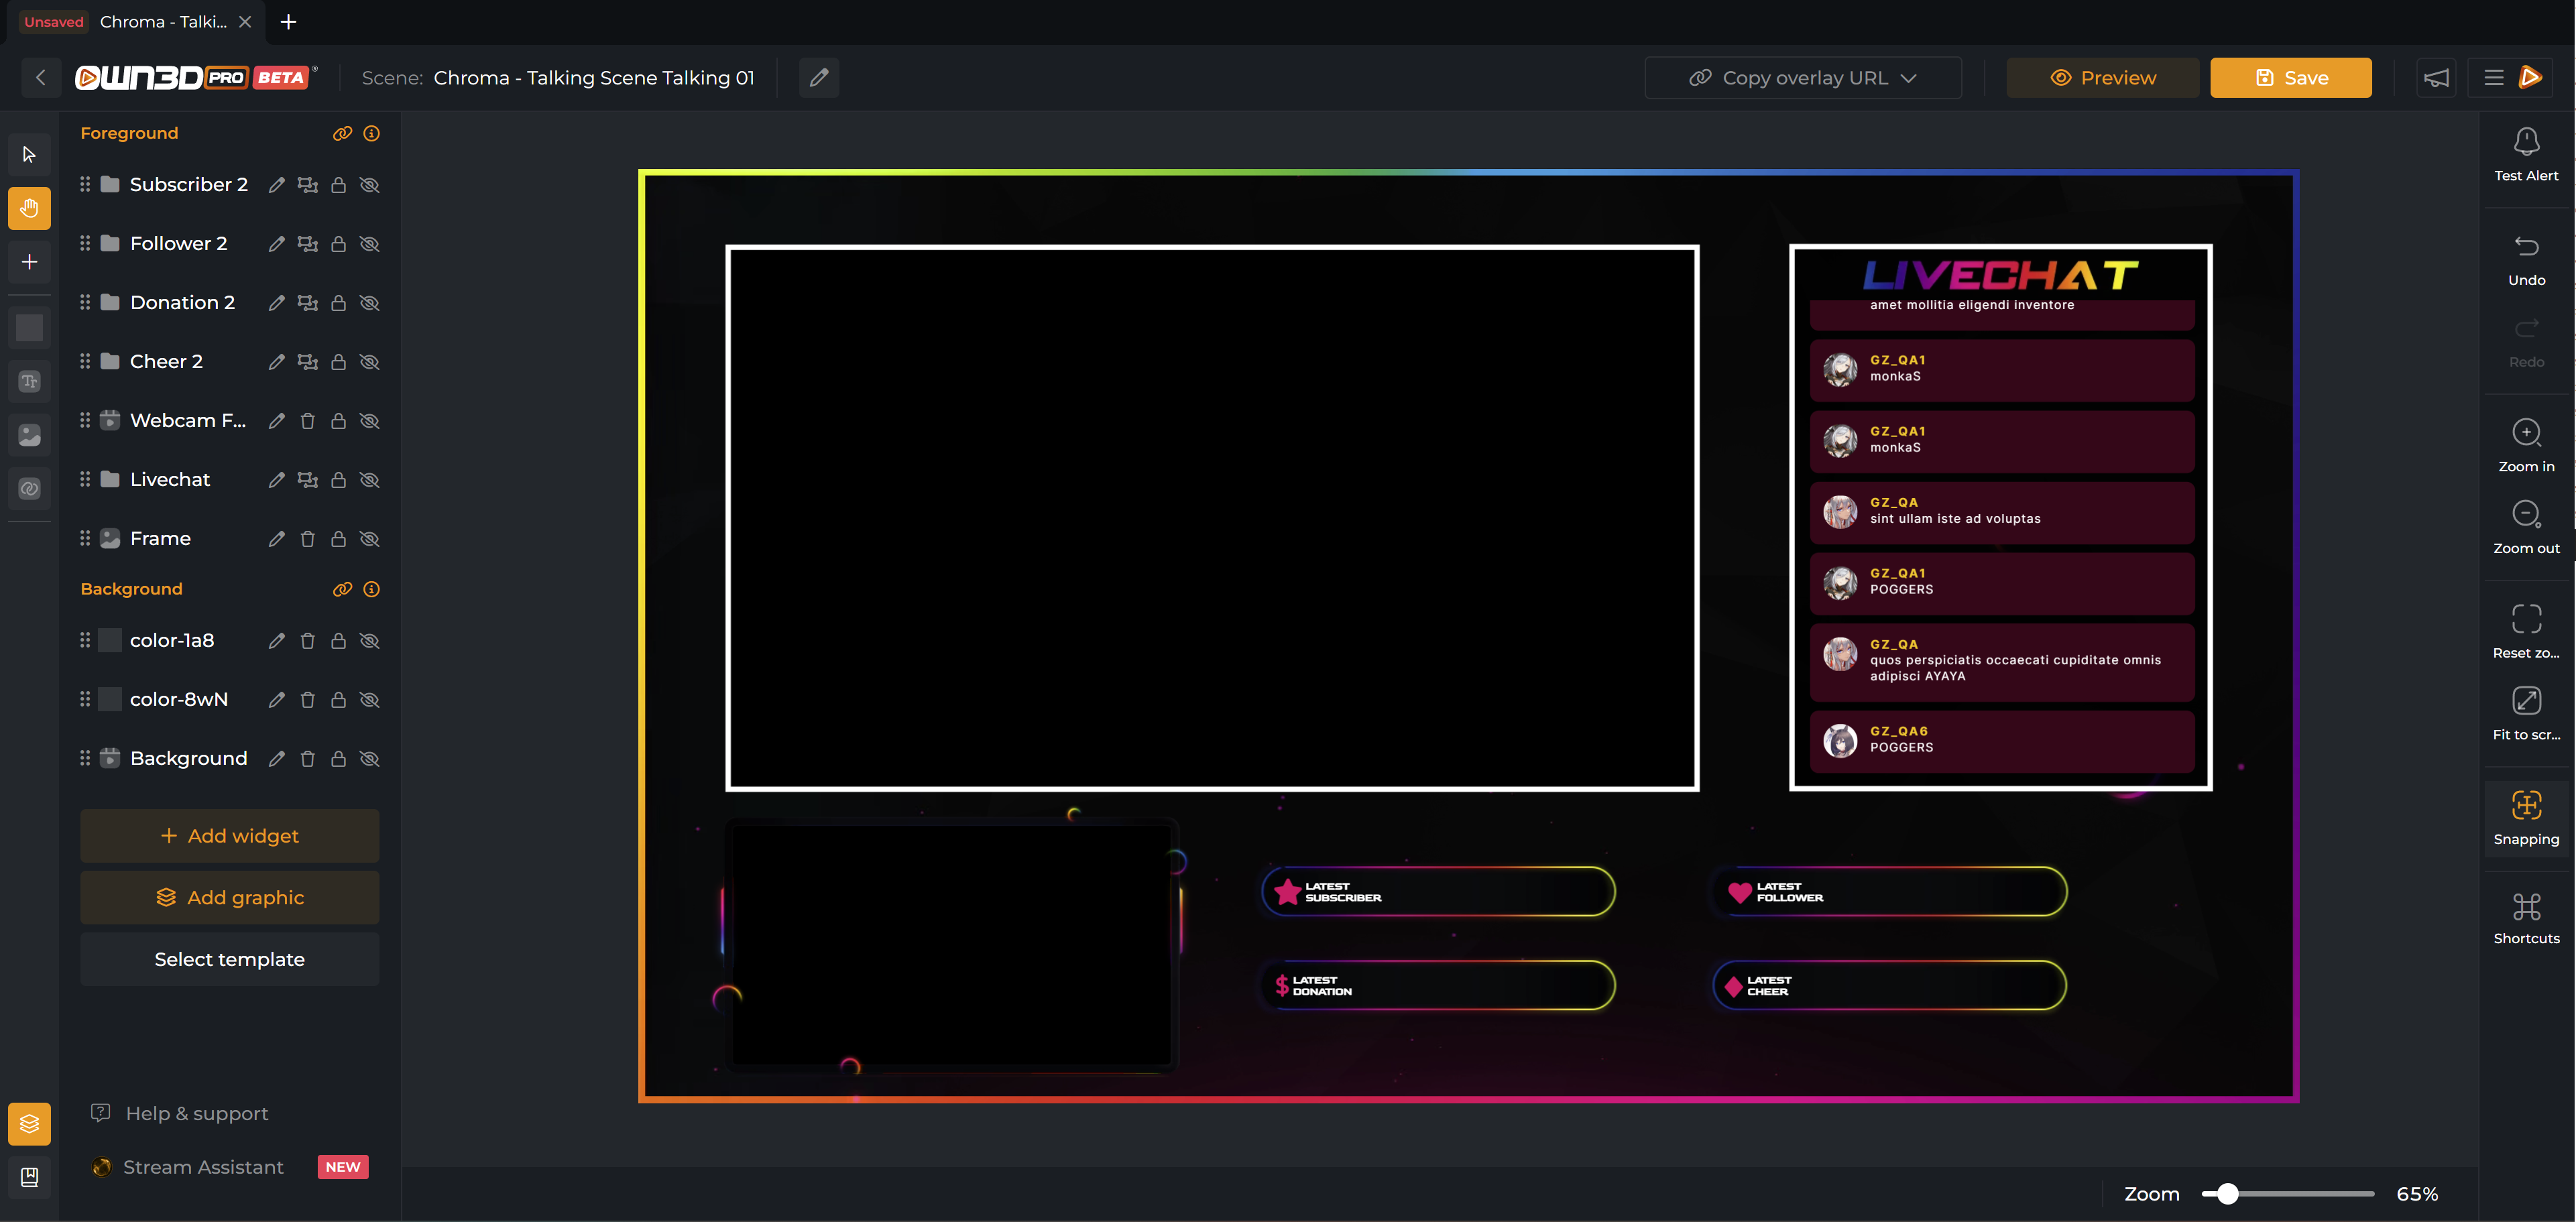
In your creative design process, many options are available to edit templates and scenes according to your ideas. In this overview, we want to show you what customization options are available in the Scene Builder.

Editing: With the pencil icon, you can enter the settings of the element you want to edit.
Removing: Click on the template. Press the "Delete"-key on your keyboard or use the “Delete” icon directly at the desired element to delete it.
Locking: With a click on the lock icon, you fix the element of your choice. You can no longer move, edit, or delete it.
Hiding: If you want to hide an element, you can do so with the eye icon instead of deleting it directly. With another click on the eye icon, the element becomes visible again in your scene.
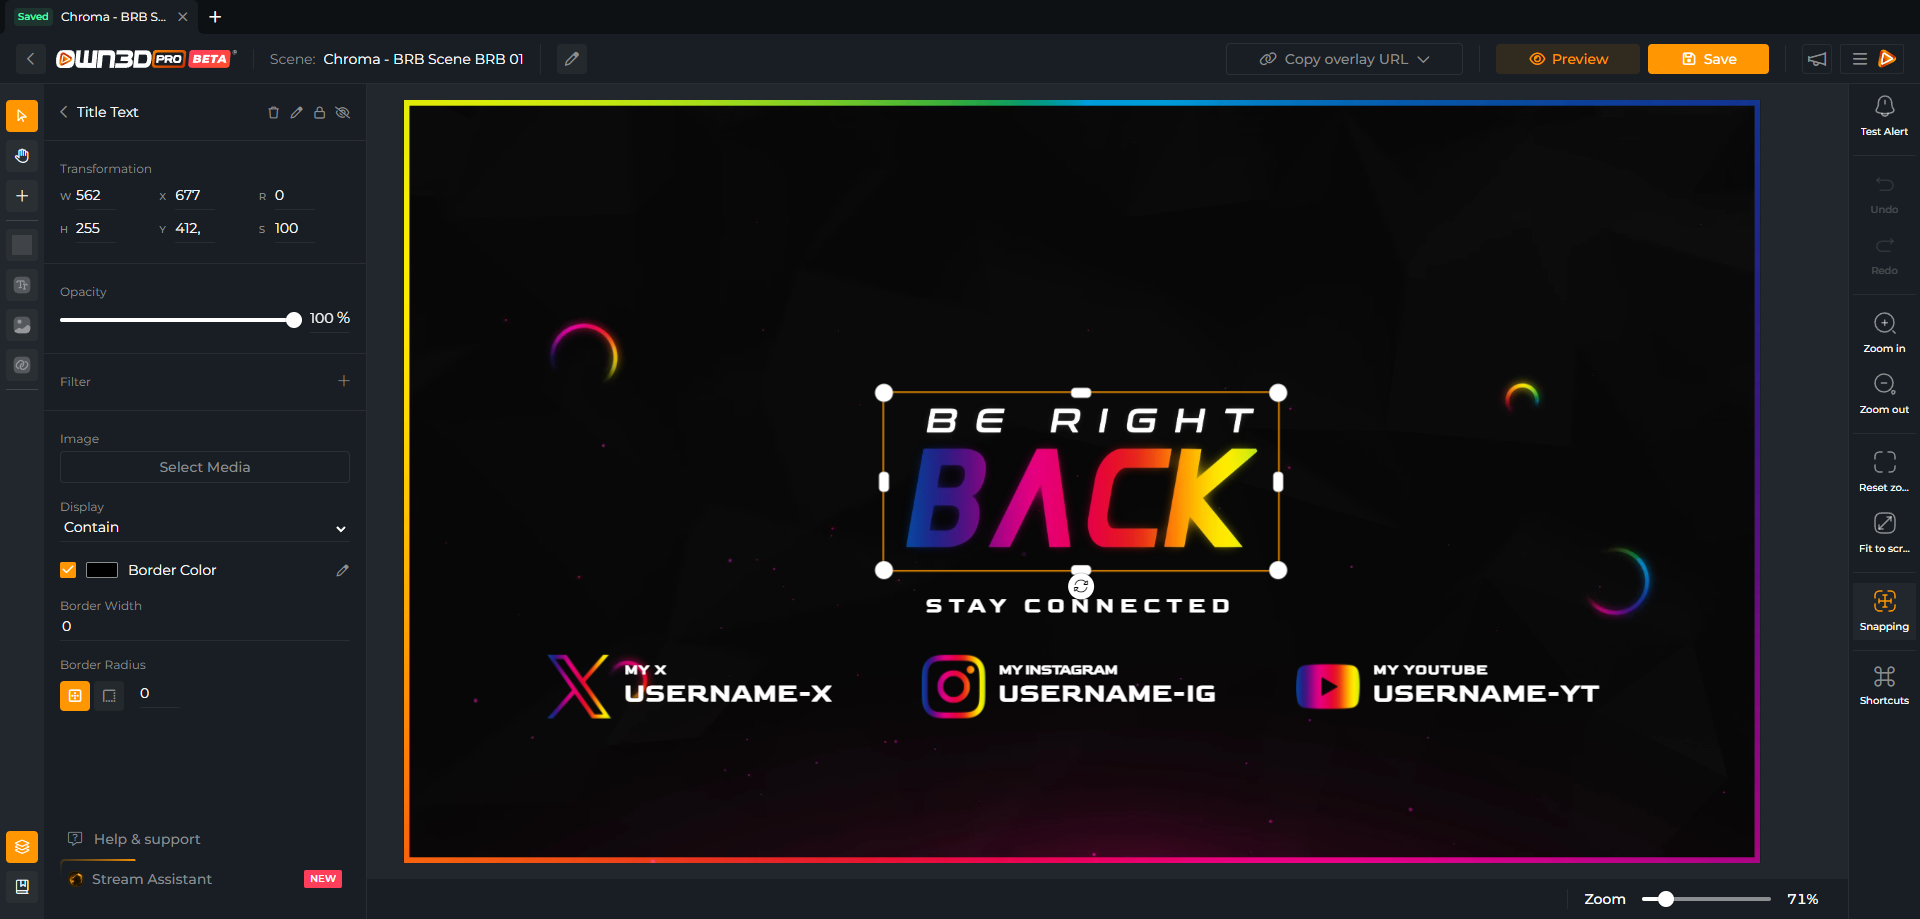
Resizing and Moving: Click on the template or element to select it. Drag the corners to change its size. Drag it around the surface to change its position, or use the arrows on your keyboard.
Rotating: If you want to rotate an element, simply click on the desired element and then use the rotate icon (located at the bottom center) to tilt the elements in a different direction.
Transforming & Layering Menu: Right-click on an element to open further editing options, such as transforming your element. Here, you can rotate overlays, texts, and other elements vertically or horizontally and adjust them within the scene. In this menu, you can also set whether the element should move to the front or back.
Grouping / Ungrouping: You have the option to group multiple elements. This can be useful if you have labels, including background designs, for example. If you have the labels and designs in a group, you can move everything at once within your scene in the Scene Builder. This way, you don't have to adjust each element again and place it in the right spot in the design.
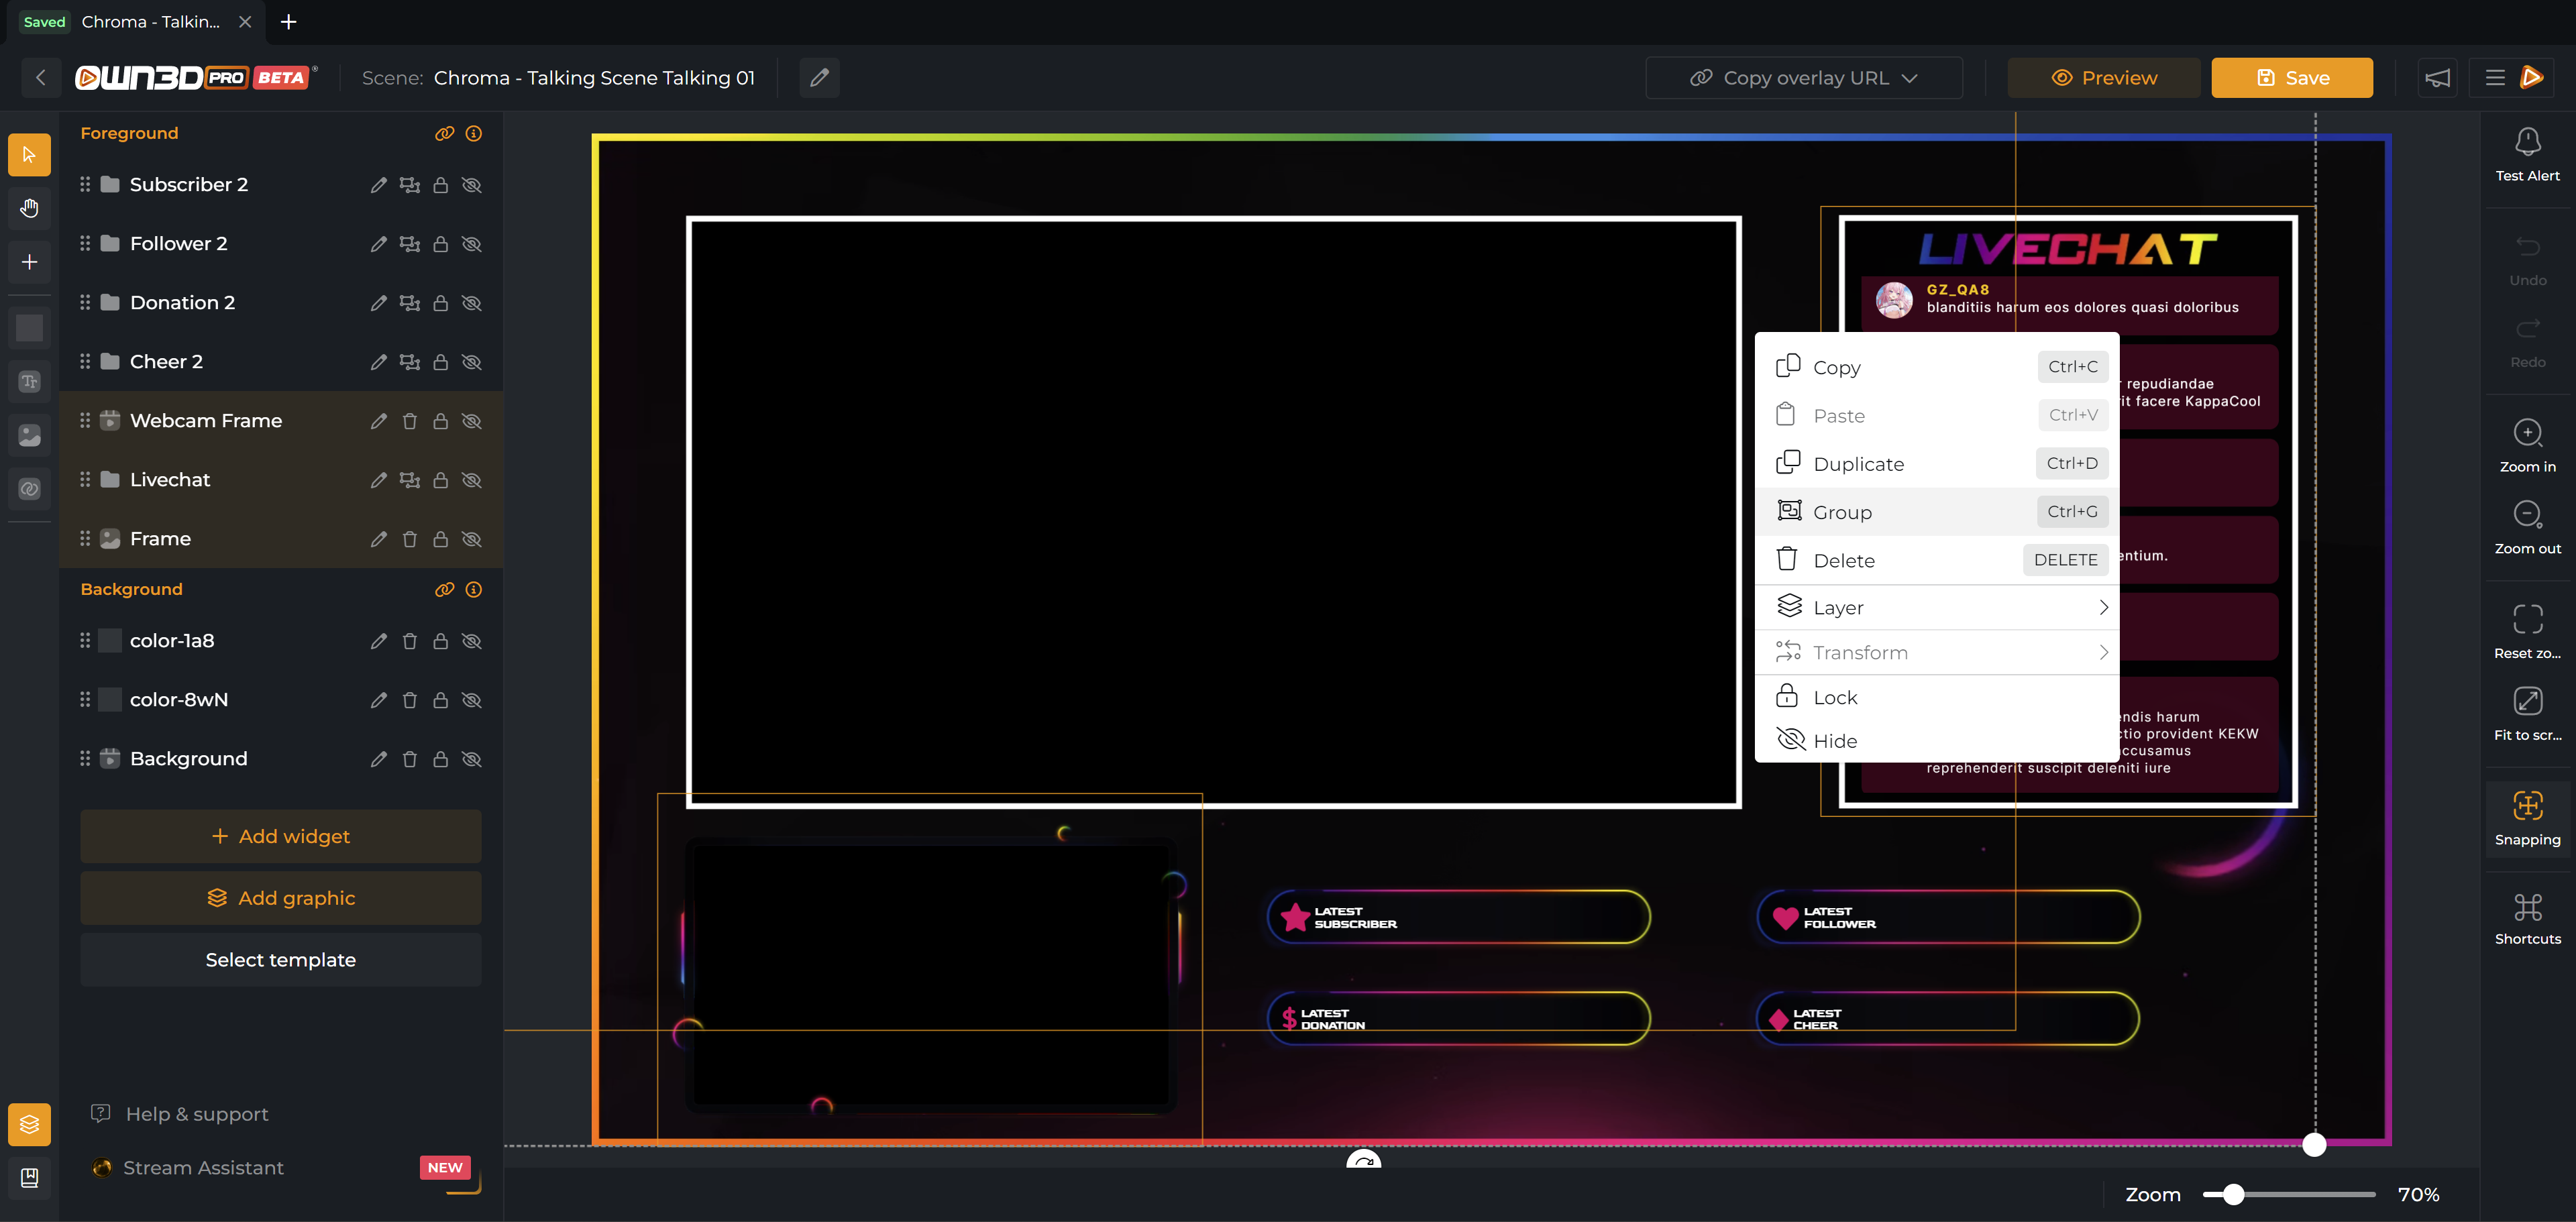
To do this, mark the elements you want to select with Shift + Left Mouse Button and right-click on one of the marked elements. You will find the option "Group" in the following editing menu. By clicking on it, you group the selected elements. You can also see which elements you will group in the left menu. These are marked in orange.
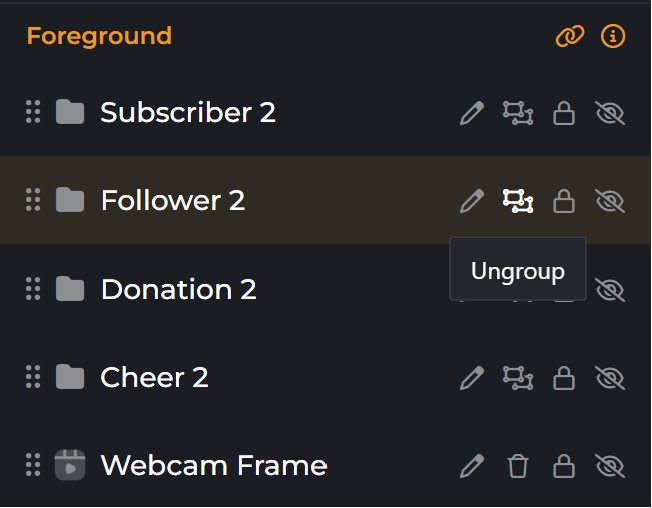
If you want to undo the grouping, simply click “Ungroup” in the left menu.
Changing Texts (such as for Social Media): Double-click on the text you want to change. Now, the settings of your text element will open on the left side. Under “Text,” you can add your text, such as your social media channel.
Adding a Social Media Logo: If you want to change a social media logo, for example, from YouTube to TikTok, you will find a selection of different social media logos in numerous designs under "Add Graphics" in the "Social Icons" category.
Add overlays to the broadcasting tool
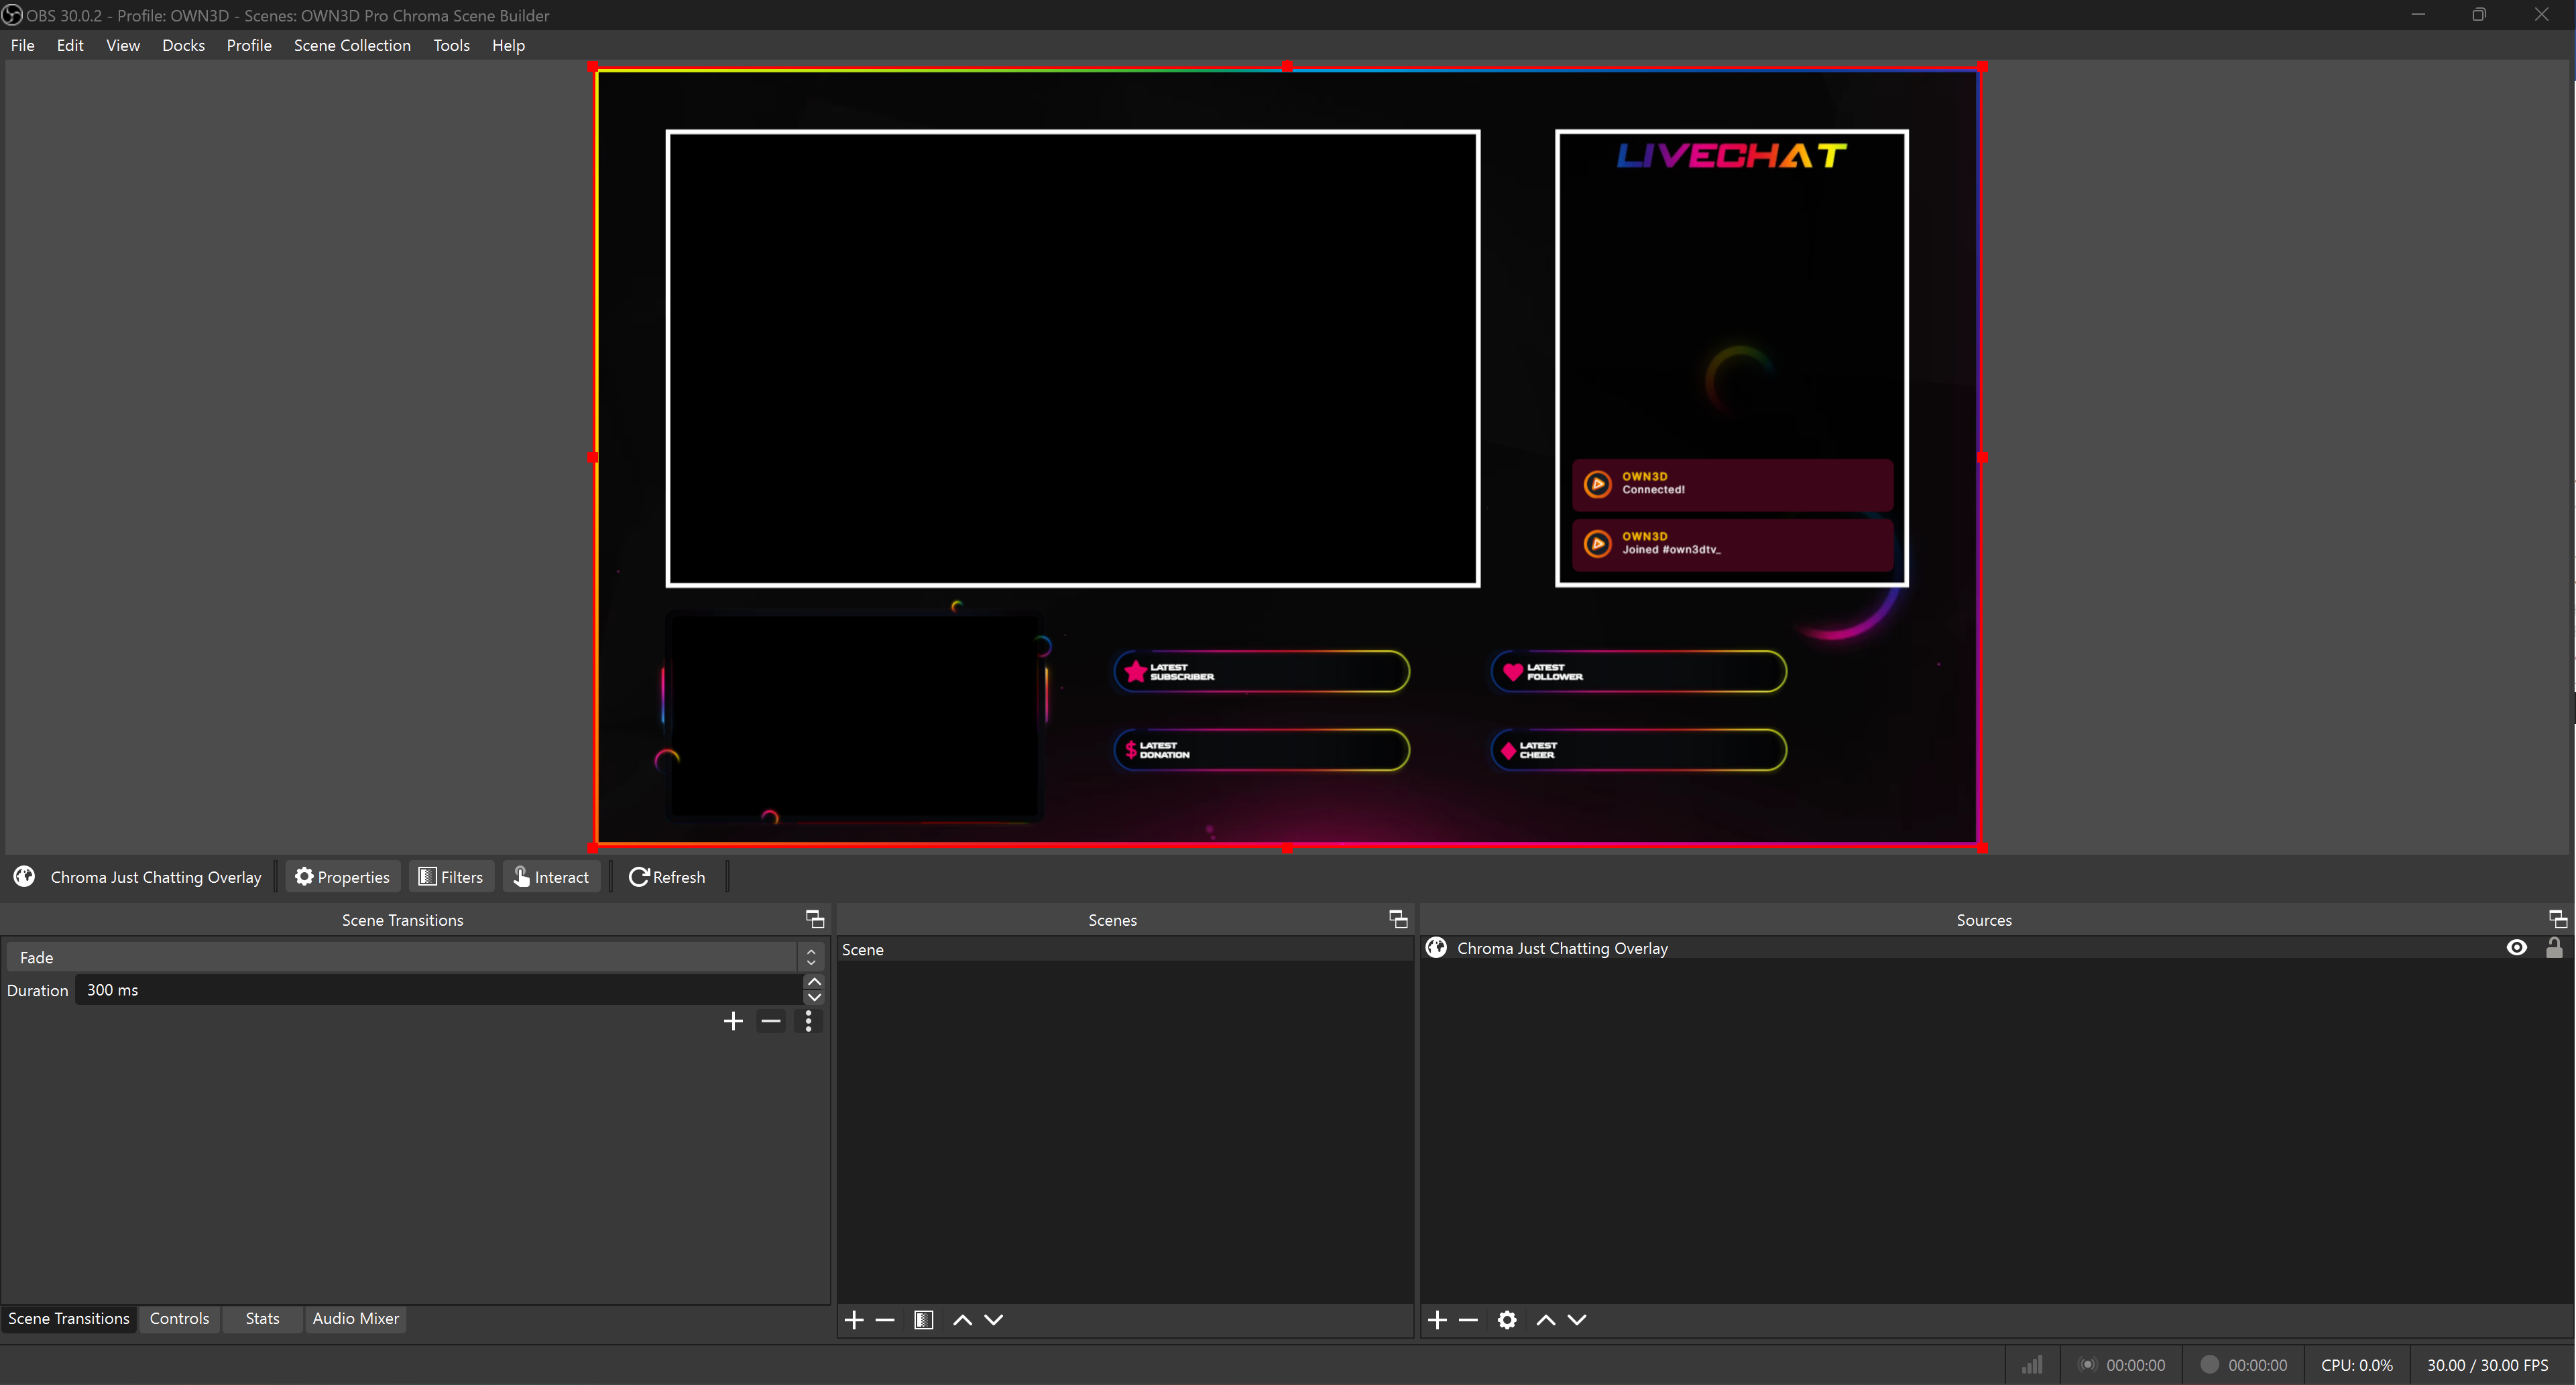
If you want to add your finished overlays to your stream, it's pretty simple. All you need is the browser source link of your scene. This browser source can always be found directly in the corresponding scene. You can either include the entire scene or work with foreground and background.
If you are working with both foreground and background, or if the template includes both, you must embed both links as browser sources. Here's what you need to consider:
The source that is at the very top of the “Sources” dock is the one that overlays all others. Conversely, the source at the very bottom, i.e., in the last position, is behind all other sources. One of the bottommost sources in the broadcasting tool should, therefore, be the background, while the foreground should be among the top sources. For example, like this:
- Alerts
- Foreground Browser Source (Overlays, Webcam Frame, etc.)
- Video Capture Source (Webcam)
- Video Capture Source (Capture Card, if streaming via console or similar)
- Game Capture / Window Capture
- Background Browser Source
How to find your browser source link
We will show you where to find the URL and how to embed it here. You can embed all your browser source links like in the following steps. We take OBS Studio here, but it works similarly with other broadcasting tools like Streamlabs or XSplit.
! Important: Never share your browser source URL with others. The URL contains sensitive data that should not be shared with other users.
Embed your URL into the broadcasting tool
Now, within the “Sources” dock, we add the browser source so that your overlay is displayed in the stream.
Different scenes for different overlays
If you want to work with multiple overlays and various scenes (such as Start Scene, End Scene, Talking Scene, and more), between which you can quickly switch back and forth live within your broadcasting tool, you need to create additional scenes in the broadcasting tool and then repeat the steps.
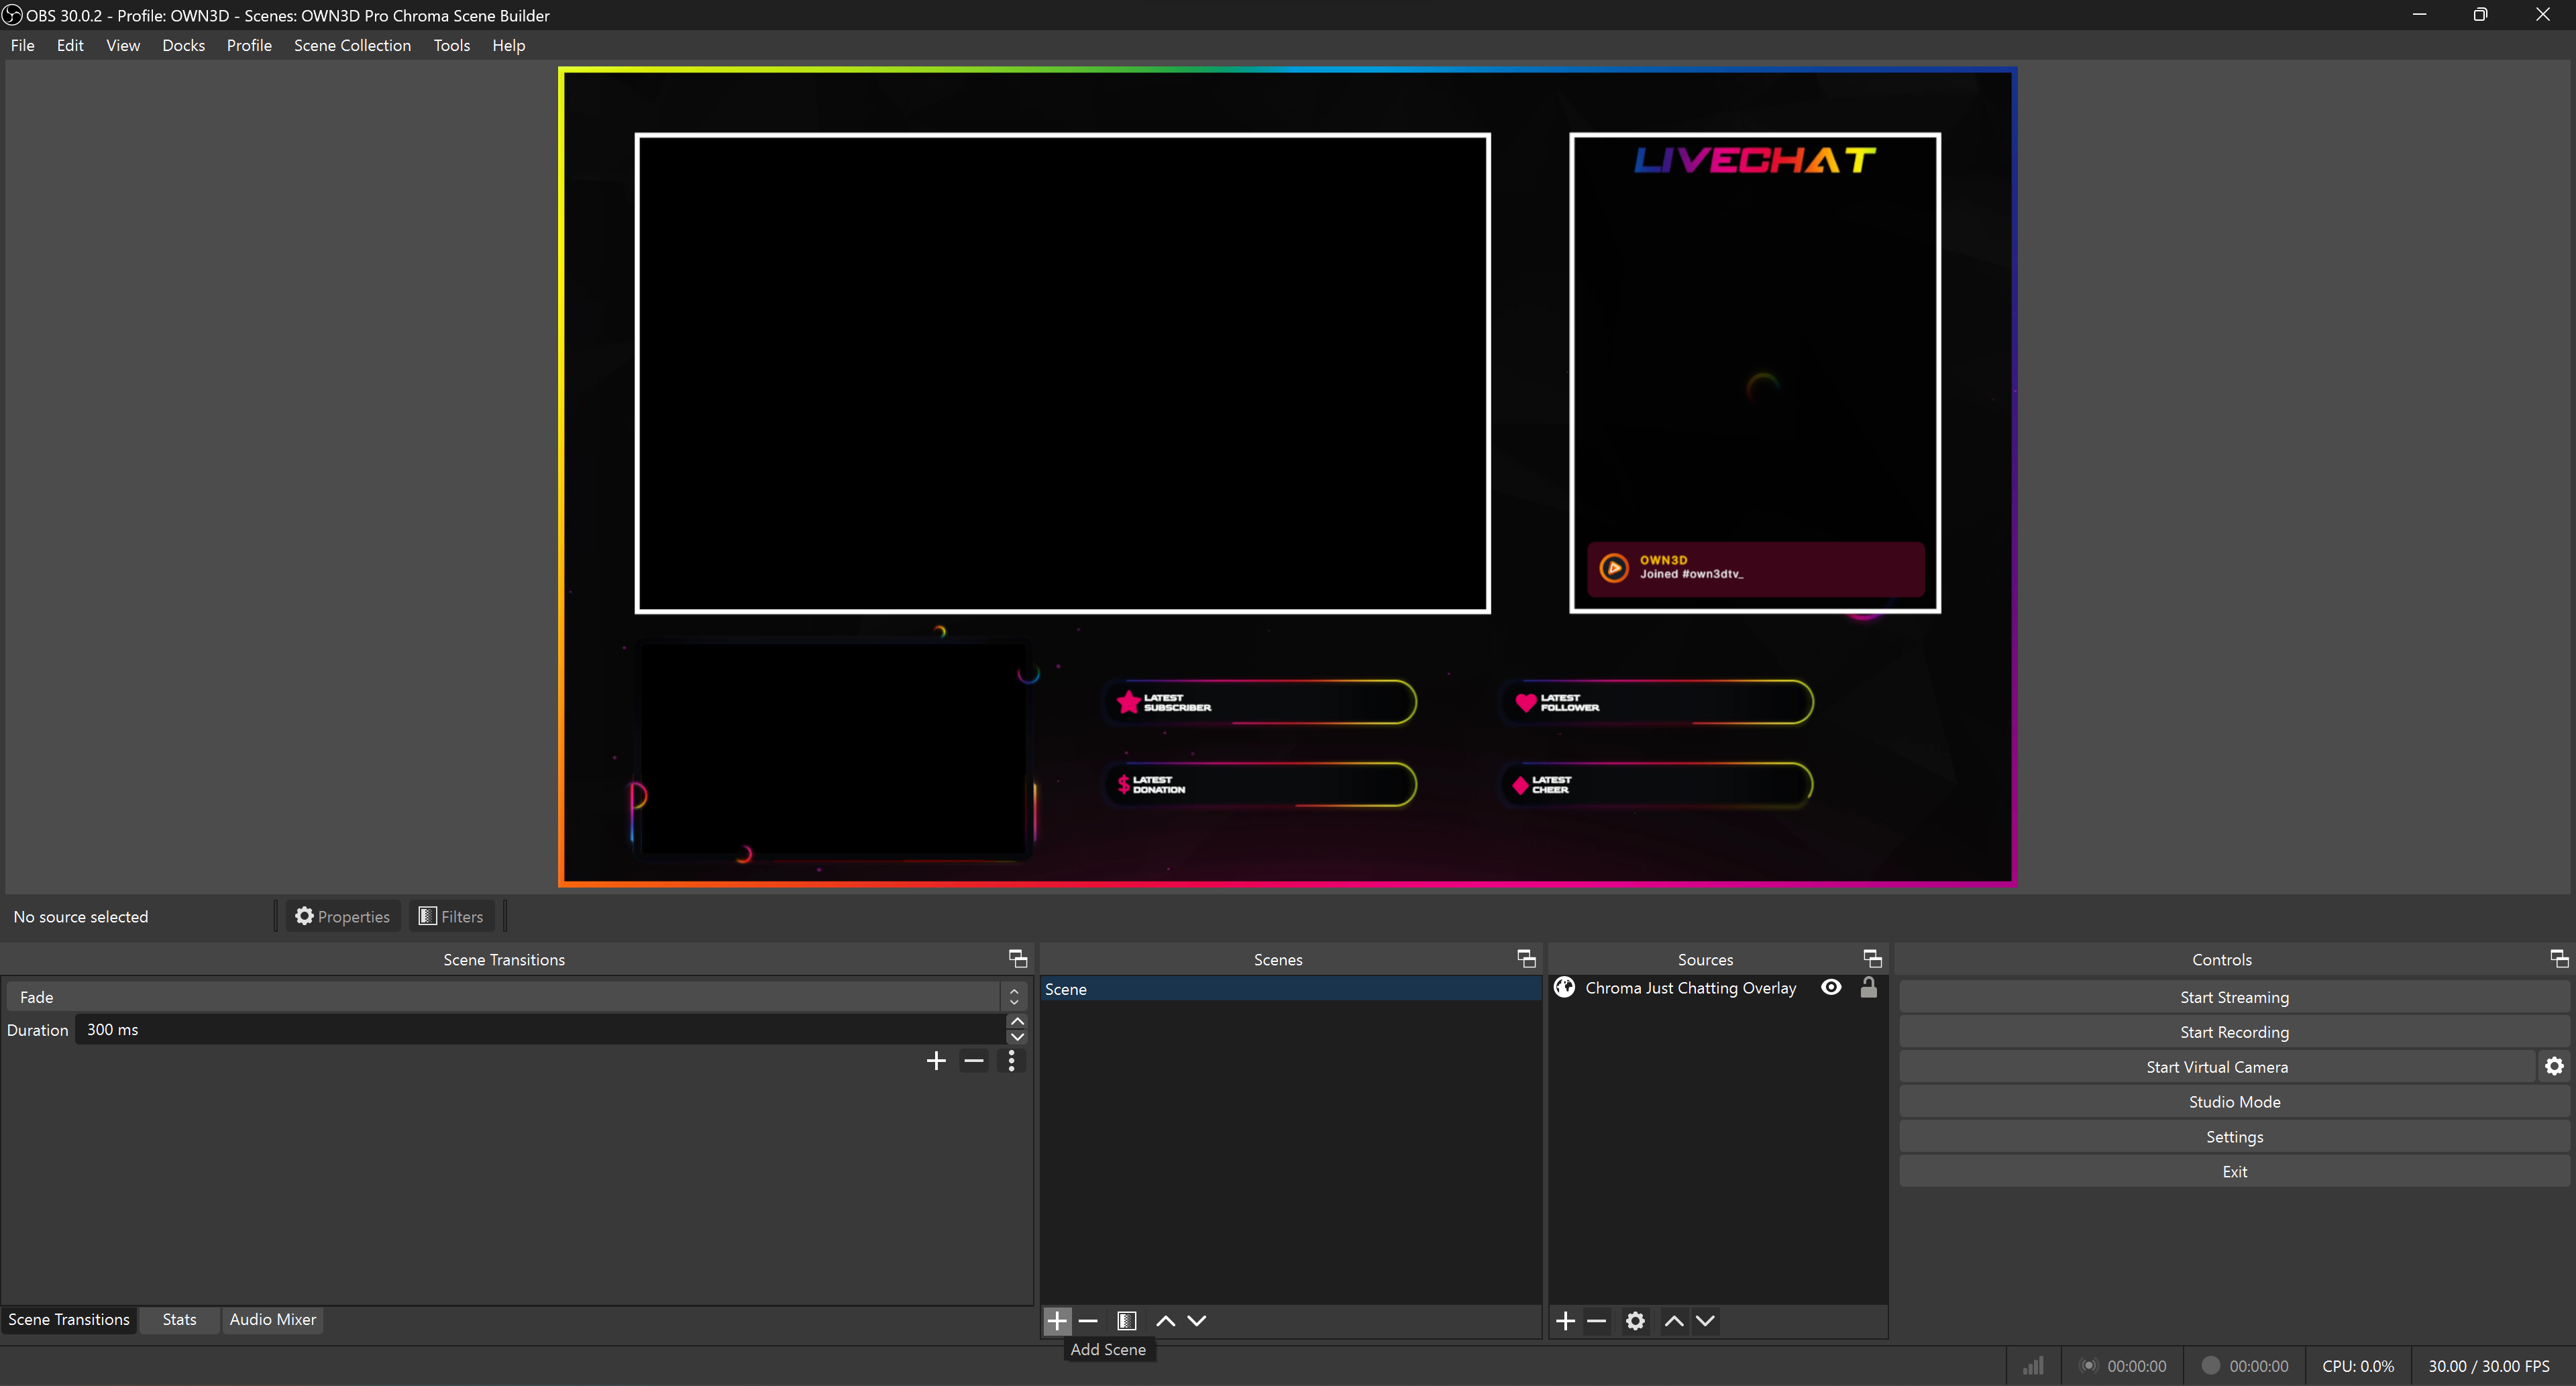
For this, within the broadcasting tool, like in OBS Studio, click on the “+” in the Scenes dock and add more scenes. Then, again, embed your browser source into the scene. Repeat this process as often as needed until you have integrated all the overlays you want.
Refresh the source in your broadcasting tool
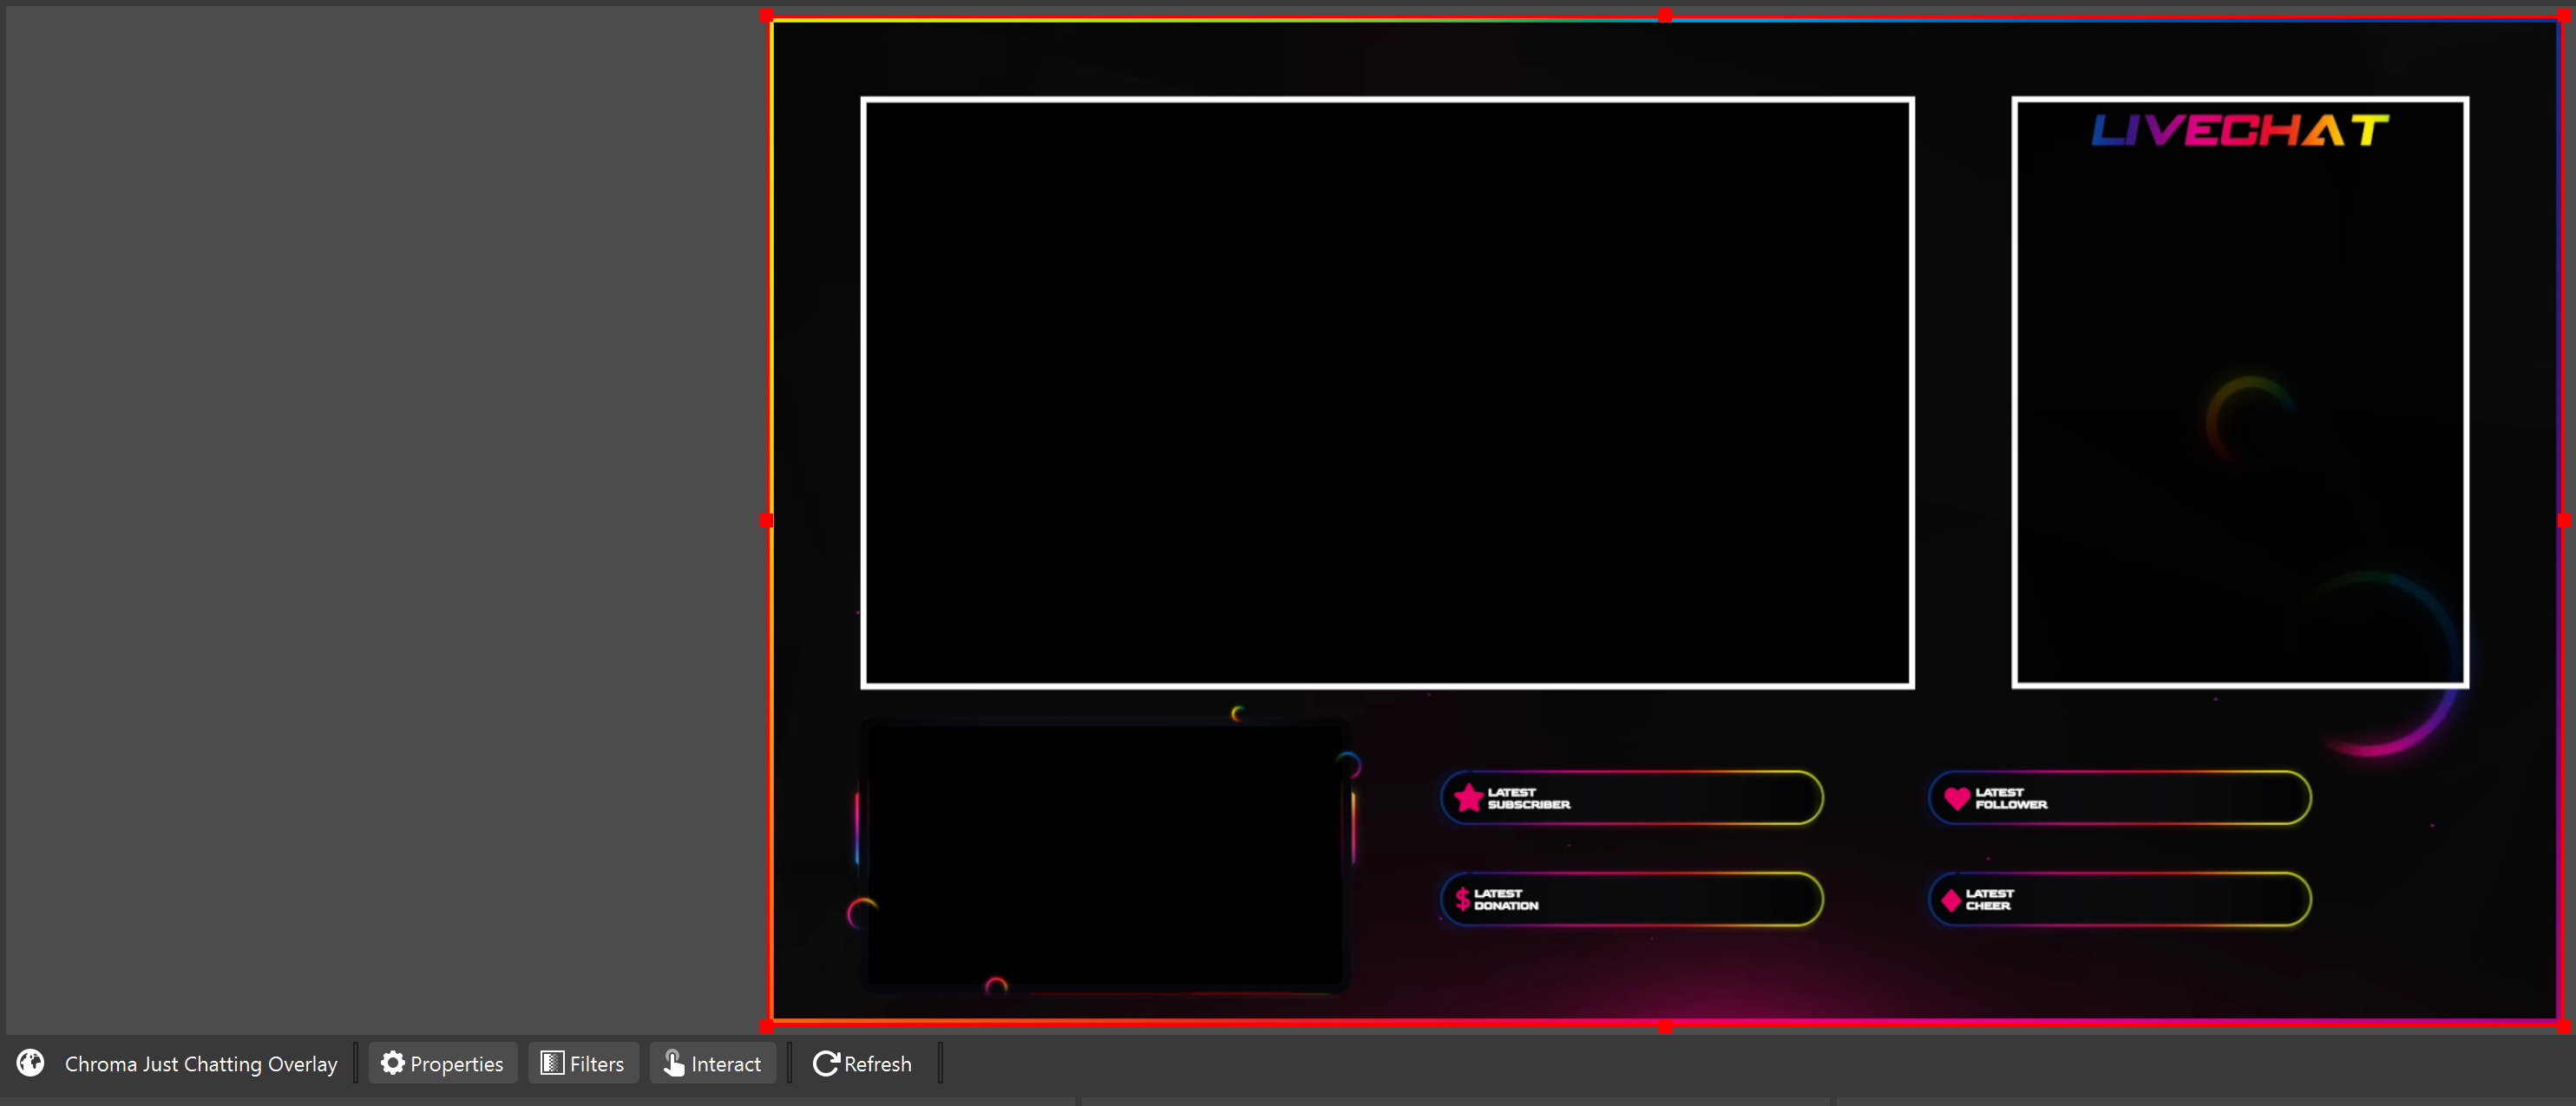
If you have already embedded your new overlay into your scene and have subsequently made and saved changes, you need to refresh the browser source within OBS Studio. To do this, click on the browser source and click on the “Refresh” button in the menu below the preview. This button acts as a kind of “F5” for your browser source, and the changes in the overlay will become visible.
The most important shortcuts in the Scene Builder
The Scene Builder offers a variety of shortcuts to make the workflow more efficient. These time-saving key combinations facilitate the navigation and editing of elements in your scene. Here are the most important shortcuts that will help you use the Scene Builder optimally and quickly create impressive overlays.
Group | CTRL + G |
Ungroup | Shift + CTRL + G |
Multiple element selection in menu | Shift + mouseclick left |
Scene Builder Menu / Tools | Right click within Scene Builder |
Undo | CTRL + Z |
Redo | Shift + CTRL + Z |
Redo | CTRL + Y |
Move Left | 🡨 Arrow left |
Move Right | 🡪 Arrow right |
Move Up | 🡩 Arrow up |
Move Down | 🡫 Arrow down |
Move Left by 10px | Shift + 🡨 Arrow left |
Move Right by 10px | Shift + 🡪 Arrow right |
Move Up by 10px | Shift + 🡩 Arrow up |
Move Down by 10px | Shift + 🡫 Arrow down |
Copy | CTRL + C |
Paste | CTRL + V |
Duplicate | CTRL + D |
Bring to front | Shift + CTRL + } |
Bring to back | Shift + CTRL + { |
Bring forward | CTRL + ] |
Bring backward | CTRL + [ |
Select | V |
Delete object | DELETE |
Fit to screen | Shift + F |
Reset zoom | Shift + X |
Pan scene | Space + Mouse |
Zoom out / in | Mousewheel |

