Introduction
Streams on Twitch have been watched enthusiastically by millions of people every day for years. Up until now, all streamers had to use third-party programs in order to be able to stream and customize their streams themselves.
In order to make it easier for new streamers to get started with streaming and to avoid having to resort to third-party providers, Twitch is now in the final development phase of its own broadcasting software - Twitch Studio.
Twitch Studio was developed with the goal of making streaming on Twitch even easier and more comprehensible for everyone. All additional features already known from other providers such as OBS and StreamLabs are also part of the functionality of Twitch Studio.
It also brings a number of other advantages, primarily the direct connection between Twitch.tv and the associated proprietary broadcasting software. For example, you can log in to Twitch Studio via your Twitch account and start streaming directly. Access to category and title are available in the dashboard and participation in the chat is also possible via the broadcasting tool.
Currently Twitch Studio is still in the final beta phase, when it will end is not yet clear. In this article you will learn everything you need to know about Twitch Studio to use the tool - have fun!
What is Twitch Studio?
Twitch Studio is a broadcasting software that allows you to stream directly on Twitch without having to use third-party tools. Unlike many other broadcasting tools, Twitch Studio is designed to make it very easy for even beginners to start a stream and customize the necessary design elements.
Advantages of Twitch Studio
The big advantage compared to other streaming softwares is the easy handling and the clear user interface of Twitch. Both give you the possibility to start your stream without much abra-cadabra or detailed understanding of broadcasting.
Optimized setup
Twitch Studio's built-in setup guide shows you what to set up from the start. This allows you to easily set up your setup step by step and adjust the bitrate to get your stream running at its optimum level. With Twitch Studio you avoid complicated and numerous settings and easily integrate microphone, webcam, monitor, green screen and capture card if you want to stream via console.
Personalization
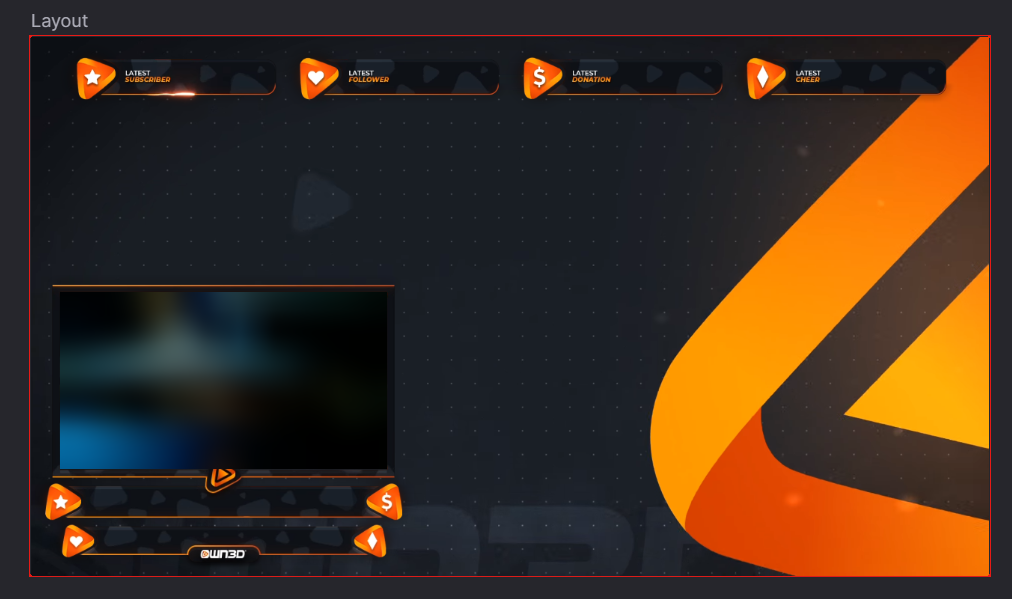
Twitch Studio gives you the opportunity to personalize your stream to make it visually appealing. The software already offers you starter layouts and overlays, which will be available after installation. If you are using one of our stream design packages, the elements contained in it are easy to use in Twitch Studio. How this works is explained below.
Integration
Because Twitch Studio is a product of Twitch, all features such as alerts, activity feed and chat are also on board, which often can only be integrated into external broadcaster software with extra plug-ins. Basically, having everything in one place makes it easier for you to build your community.
Twitch Studio - Download and Installation
Installing Twitch Studio is easy. Just go to the Twitch Studio website https://www.twitch.tv/broadcast/studio and download the necessary EXE file for Windows or .DMG file for Mac. Afterwards the installation process is the same as for most other programs you have installed on your PC.
Currently Twitch Studio is available for Windows, more precisely for Windows 7 or a higher version and since June also for Mac. To keep up to date with the latest Twitch Studio news, visit https://twitch.uservoice.com/forums/923041-twitch-studio.
There you can also bring in your own ideas that you think will improve the user experience of Twitch Studio.
Using Twitch Studio on PC / Mac
Once you have installed the Twitch streaming software, you can access it from the start menu or desktop. First of all, your login to Twitch is required. After that you can use the functions and settings you have already used. The first steps should be to link your setup to Twitch Studio. Once the mic, webcam and co. are up and running, you can take care of the interface. How to do this is explained below under "Add / Change Layouts and Screen".
System requirements
Like any software, Twitch Studio requires your PC to have some basic hardware requirements. However, since streaming generally requires certain services to the system, those for Twitch Studio are automatically fulfilled if they are given.
Here are the minimum and recommended requirements for Twitch Studio:
Minimum requirements:
- Windows 7 (64-bit version) or macOS 10.14: Mojave
- DirectX 11-compatible
- 4 GB RAM, 2 GB should be unused)
- Processor with 4 cores, no matter if AMD or Intel
Recommended requirements:
- Windows 10 (64-bit version) or latest Mac version
- NVIDIA GTX 10 series or later
- 8 GB working memory
- processor with 4 cores and 8 threads, also AMD or Intel
Using Twitch Studio on the XBOX, PS4 or Switch
Twitch Studio cannot be installed on consoles. But as with other broadcasting programs, you can connect your console to your PC via a capture card. These are available from Elgato, Avermedia and also Razer.
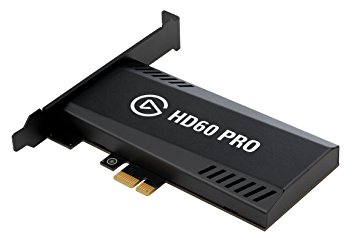
Twitch Studio supports all Elgato models from version HD 60S upwards, all Avermedia models from Live Gamer Extreme 2 upwards and the Ripsaw HD and SD from Razer. Twitch is constantly working to ensure that capture cards from other manufacturers are supported in the future.
Once you have connected your capture card to your PC, you can add the image and sound it transmits by selecting "Split Screen" under "Add Layers".
You can add layers if you have created a "Stream Layout" and right click on "Edit". At first you can use "Standard", which will be used as a template after the first start. You can rename it or create a new one with "+".
The stream-layouts will later be your scenes, between which you can switch back and forth. For example, you can have a start, gameplay or just-chatting layout. We will show you how to set these up.
Basic settings
As mentioned before, you'd best start by connecting your microphone, cam, green screen and the rest of your setup to Twitch Studio. Normally this is done automatically as soon as the devices are connected to the PC - except for the greenscreen, for which we have a manual for you.
Before we start with the peripherals, you should create the individual stream layouts. These will later be your scenes during the stream and you can switch between them. It is best to name them comprehensively so that it remains clear. Examples: Just Chatting, Start, End, Gameplay with/without webcam etc.
Microphone
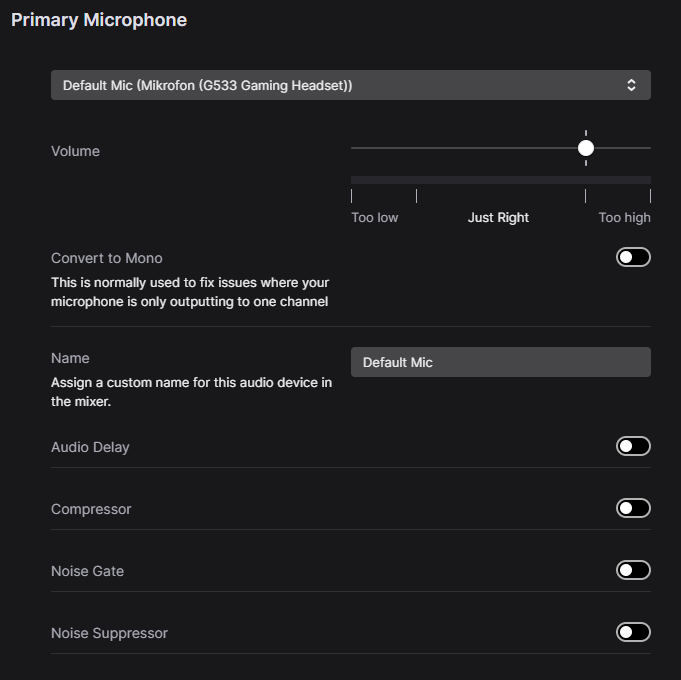
If you click on "Settings" in the lower right corner of Twitch Studio and then on "Audio", you can check if the microphone is set correctly. You can also improve the sound, if your room or microphone makes it necessary. To get the best sound, test yourself by checking the possible settings. Unlike with OBS, for example, the settings are very easy to navigate and have a clear function.
Webcam
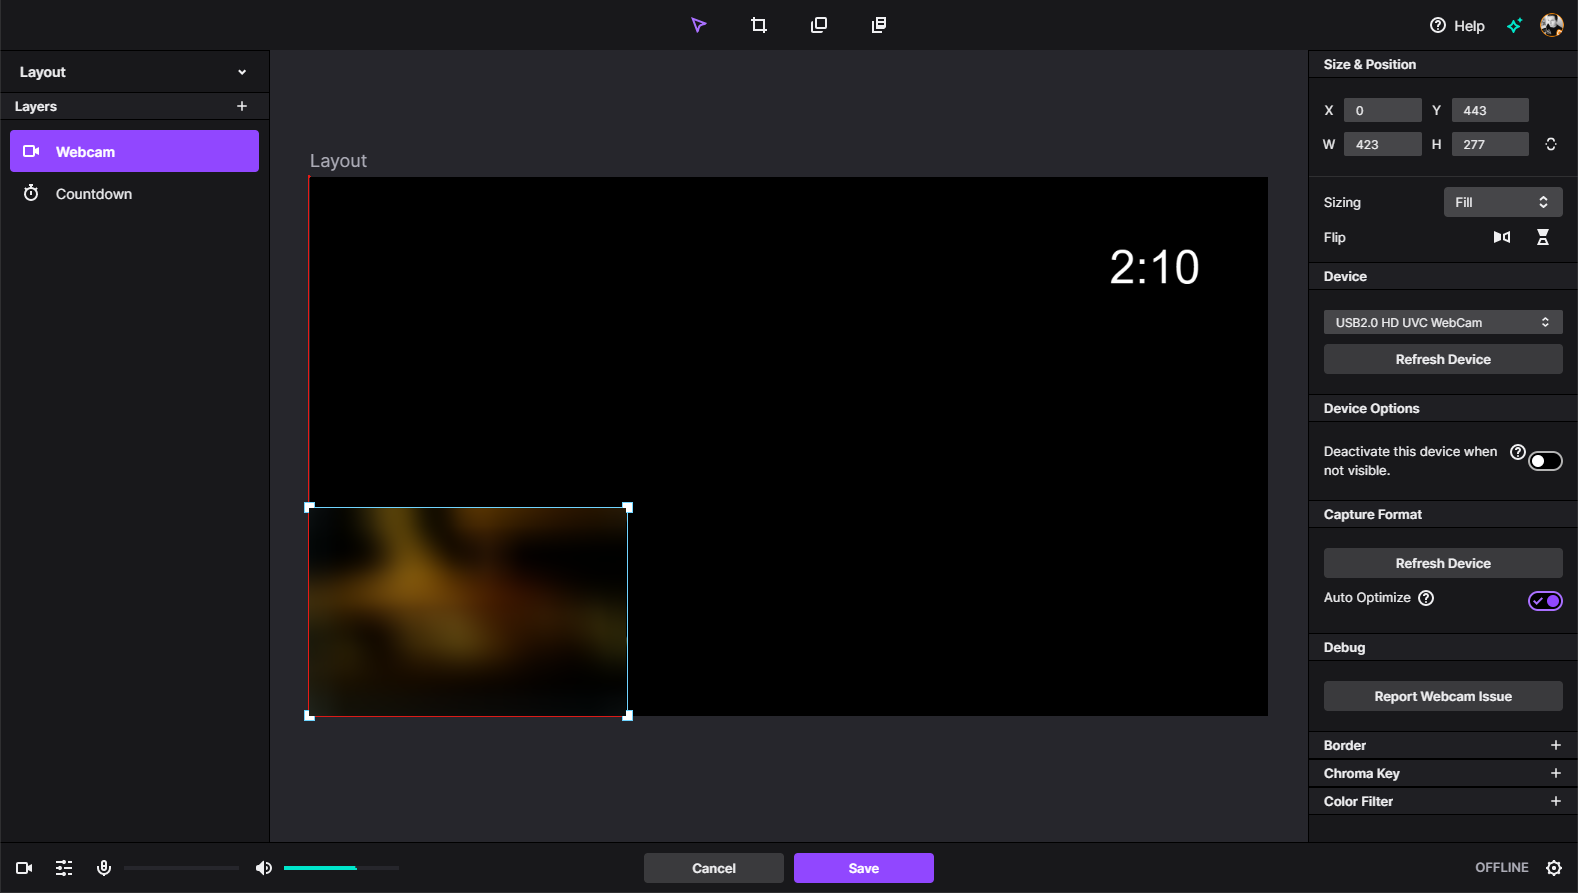
You add the webcam over your stream layouts. Select the layout in which the webcam should be visible later. Then right-click on "Edit" and open a new layer with "+". In this case use "Webcam". Afterwards you can move the window to the place where you want to have the facecam in the stream.
Greenscreen
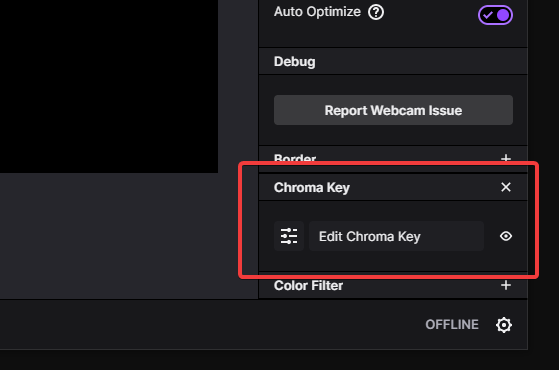
If you are using a green screen, activate the Chroma Key in the right menu when you have selected the webcam layer. This layer is preset to the typical green and removes the color that way.
With these basic settings you could already click on "Start Stream". But if you still have overlays and alerts in stock that you want to place over the individual layouts, we will now explain how to do this.
Add / change layouts and screen
Overlays help you to make your stream even more attractive and inspire your viewers. It is up to you whether you take over an entire theme or only single elements of it.
If you buy a complete package in our online store, the chosen theme and many individual elements such as static and animated images, backgrounds and frames as well as badges and alert sounds are available as individual files.
How to add the overlay and all design elements to your stream is explained in the following.
Insert and modify overlays in Twitch Studio
Twitch Studio offers some overlay templates for a quick start, but if you want something individual, you can easily create it.
Once you have chosen a complete package from our store, you will have several files with different functions at your disposal. First of all you have to set up your overlays. In the next paragraph we show you how to integrate alerts, sounds and badges.
Save your overlay files in a separate folder for ease of use. Then go to Twitch Studio and click on the + on the left under "Stream Layout". This will create a new layout that you can rename with a right click. Since you will have different layouts for different stream content later, you should do the same for clarity. For example, start with your start layout.
Now right-click again on "Layout" or on the name you renamed. Then go to "Edit".
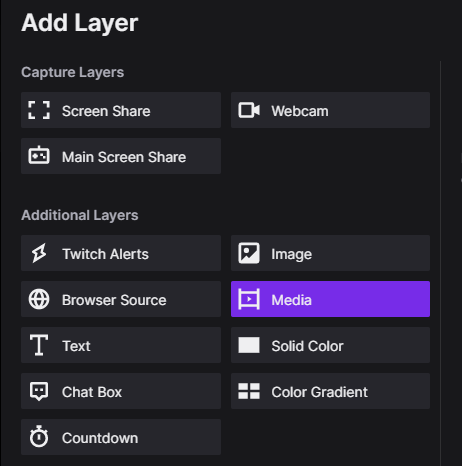
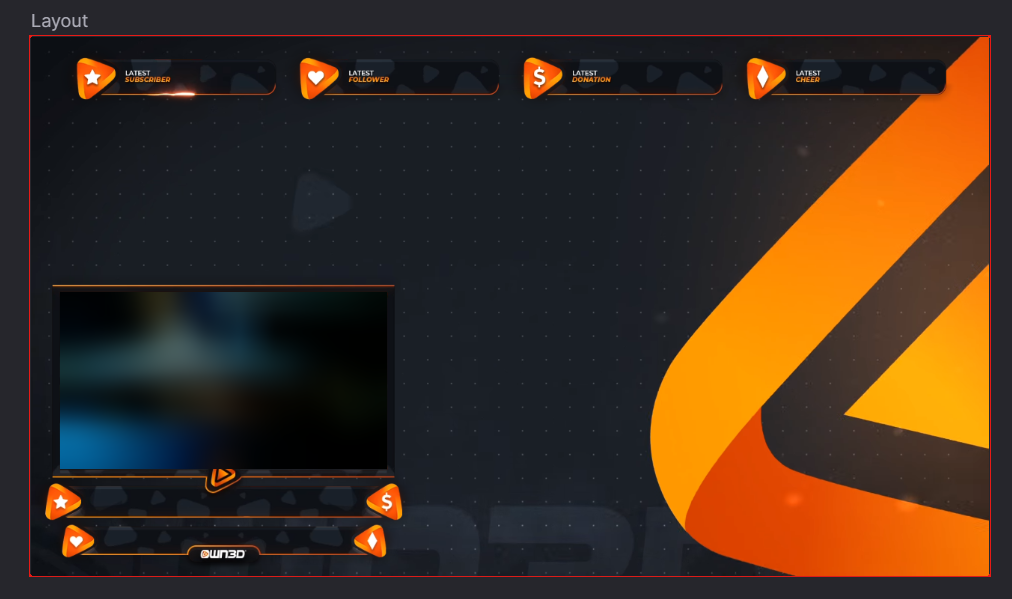
At first you will see a black window. To change this, click on the + next to "Layers" in the left menu. You will then see a selection of different layers that you can integrate. For the start overlay, select "Image" and then go to "Browse" under "Image file" in the left menu.
Now choose the appropriate overlay from the folder you created at the beginning where you saved the overlay files from the Stream Design complete package. Afterwards it appears in the media library. Click on it and go to "Select". As easy as it is to integrate an overlay into Twitch Studio, it is also easy to edit other points.
So you can easily zoom in or move the image with your mouse as it suits you best. In addition, you can include a frame that you can color according to your taste – this is ideal for the Facecam. There are also other settings available for color filters and fills.
Now you can repeat these steps to install other layouts. This allows you to switch between the different stream layouts in Twitch Studio during the stream.
Insert custom alerts, alert sounds and badges
Setting your alerts, sounds and badges is also easy in Twitch Studio. Since Twitch Studio is currently still in the beta phase, you have no possibility to use animated alerts and badges.
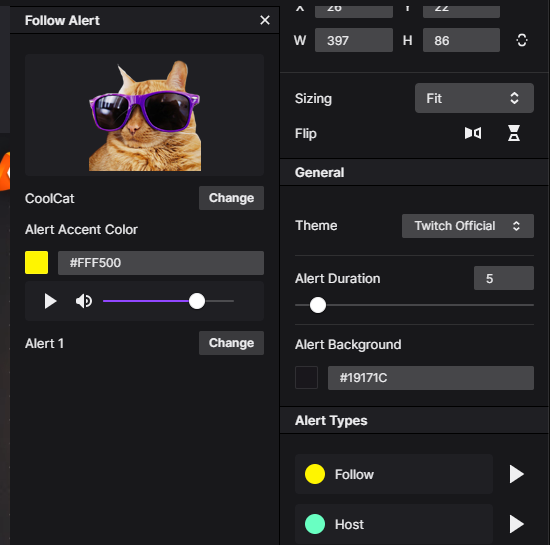
All our static alerts and badges are compatible with the app and can be inserted as follows: Open the desired layout in the main screen and click on "Edit layout". You will then see the five different types of alerts and the corresponding alert sounds in the bottom right corner of the screen.
You can edit each of these with a single click. Open the desired alert, for example "Host", and you can both set the desired position for the alert and replace the currently existing alert with one of our alerts included in the package. All you need to do is insert the image file for an alert - as with overlays - and the audio file for an alert sound and save the whole thing once.
And you have already inserted individual overlays and alerts. In most cases, the time required will not exceed 15 minutes. So with Twitch Studio you have more time to concentrate on your stream instead of watching extensive tutorials for external broadcasting softwares.
Alternatives to Twitch Studio
Comparing Twitch Studio with other streaming software like OBS, XSplit etc. is difficult. It is not designed to be a competing product for established broadcaster software, but to give streaming beginners a simple start into the Twitch world.
Often, prospective streamers despair of the complexity of OBS, for example. The tool is comprehensive, provides numerous settings and requires a certain basic knowledge to use it optimally. Although this is easy to get by tutorials, it requires a lot of time. To save yourself this and the complex steps, Twitch Studio helps you to get a quick and easy start into streaming life.
While Twitch is developing additional features for its software, it will continue to focus on simplicity and clarity in the future. The Amazon company claims that Twitch Studio is aimed at beginners, not at those who already work with and know broadcaster software.
Therefore Twitch continues to recommend OBS, Streamlabs OBS, Streamelements, Lightstream and XSplit on its streaming tools page.
FAQ - Frequently asked questions about Twitch Studio
What is Twitch Studio?
Twitch Studio is the streaming platform's in-house broadcaster software. It allows you to broadcast your streams graphically enhanced by overlays and other design elements.
Because Twitch Studio does not require any external software, it simplifies many steps and settings. In this way it simplifies streaming tremendously.
How can I download Twitch Studio?
You can find the link to the Twitch Studio installation file under "Streaming Tools" on your Creator Dashboard. There you simply click on "Download".
The only way to get Twitch Studio even faster is to follow the link: https://www.twitch.tv/broadcast/studio
Can I use Twitch Studio on a Mac?
Yes, since June Twitch Studio has also been available in a version for Mac OS users.
Is Twitch Studio better than OBS?
That is a matter of opinion. However, Twitch Studio is designed to make it easier to adjust and customize a stream. It also makes streaming easier because it stays on one platform - Twitch.
But since Twitch Studio is still in beta, OBS and Co. are still the perfect companions for those who want to go into the smallest detail when customizing their streams. Twitch itself says that Twitch Studio is aimed at streamers just starting out.
Can Twitch Studio also be used on the PS4?
No, that is currently not possible. Whether an app for the consoles will be released is not known yet. However, you can stream with Twitch Studio via a capture card (Elgato, Avermedia or Razer) with your PS4, Xbox or Switch over your PC. You will find instructions for this above in this article.
Is Twitch Studio better than OBS?
That is a matter of opinion. However, Twitch Studio is designed to make it easier to adjust and customize a stream. It also makes streaming easier because it stays on one platform - Twitch.
But since Twitch Studio is still in beta, OBS and Co. are still the perfect companions for those who want to go into the smallest detail when customizing their streams. There are many third-party tools for OBS Studio that can extend the broadcasting software’s functionality. Once you connect your Twitch account in OBS, you will also have the option to display emotes from BetterTTV or FrankerFaceZ in the chat. This extension is still missing in Twitch Studio. In fact, Twitch itself says that Twitch Studio is aimed at beginner streamers, so it won’t have all the possible features that you can use.

