Read the policy
Before you take your first step on Twitch, be sure to read the purple streaming platform's Community Guidelines. They are important to know what you are and are not allowed to do.
For example, hate speech, racism, discrimination against viewers, or playing unlicensed music is prohibited. There is also a certain dress code to follow, spam to regulate and some other important points. Click here for the Twitch guidelines!
Create account
Now that you're up to speed on the community guidelines, let's get started. First and foremost, you need to register on Twitch. Similar to other portals, this involves creating an account with an email address and password. To do this, it's best to use your computer and go to Twitch.tv. At the top right you will find the button "Register". Afterwards, a form opens that you have to fill out without exception.
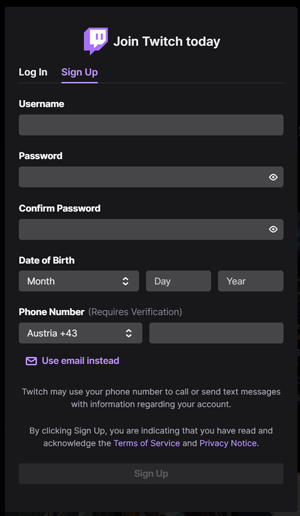
The username is the one that will be displayed later on your channel page. Your followers will identify themselves by it and it will create a recognition value; just like your design, but more about that later.
When choosing a username, make sure that it is legible, fits you, is not a random string of alphanumeric characters, and ideally has a certain flair. Ideally, you should also check whether the name is available on social platforms and save it right away to avoid problems later on.
The good news is that if you ever want to change your name, you can do so in the Twitch settings. Note, however, that this is only possible every 60 days. What you can change at any time, however, is the capitalization of your chosen username.
After adding an email address, your date of birth, and a password to the form, click "Register". Then you need to confirm your email address by checking your mailbox for an email from Twitch and entering the code in the form on Twitch.tv.
To protect your account from unauthorized access, you should set up two-factor authentication in the settings under the "Security and privacy" tab. Every time you log in, regardless of which device you use, you will first be sent a code to your mobile number or Authy (mobile app). Only with this code you can log in after entering your email address and password.
Et voila, your Twitch account has seen the light of day. Now you can start designing and setting up your Twitch profile.
Customize Twitch profile
To make one or the other important setting in your new account, go to the right on the still unfilled profile picture and then to "Settings".
Here you can upload a profile picture and a banner. If you don't have one or both of them yet, you can find a lot of customizable banners and profile pictures in the OWN3D store.
You decide whether to upload a profile picture of yourself or a logo that suits you. You can also create an avatar that shows you in manga style, for example. With our Avatar Maker you can create a personal avatar in a few minutes.
Important note: All design elements (banners, logo, overlays, alerts, etc.) should be graphically coordinated. This way you ensure a consistent image of your channel which is attractive to potential followers.
Also note that logos and other graphic elements on the Internet may be subject to copyright and therefore cannot be easily used on your Twitch channel. So if you find something on Google, make sure that you are legally allowed to use it.
After you have added a banner and a profile picture, you can write a few words about yourself in the "Biography" section, which you can find under your username below the banner upload.
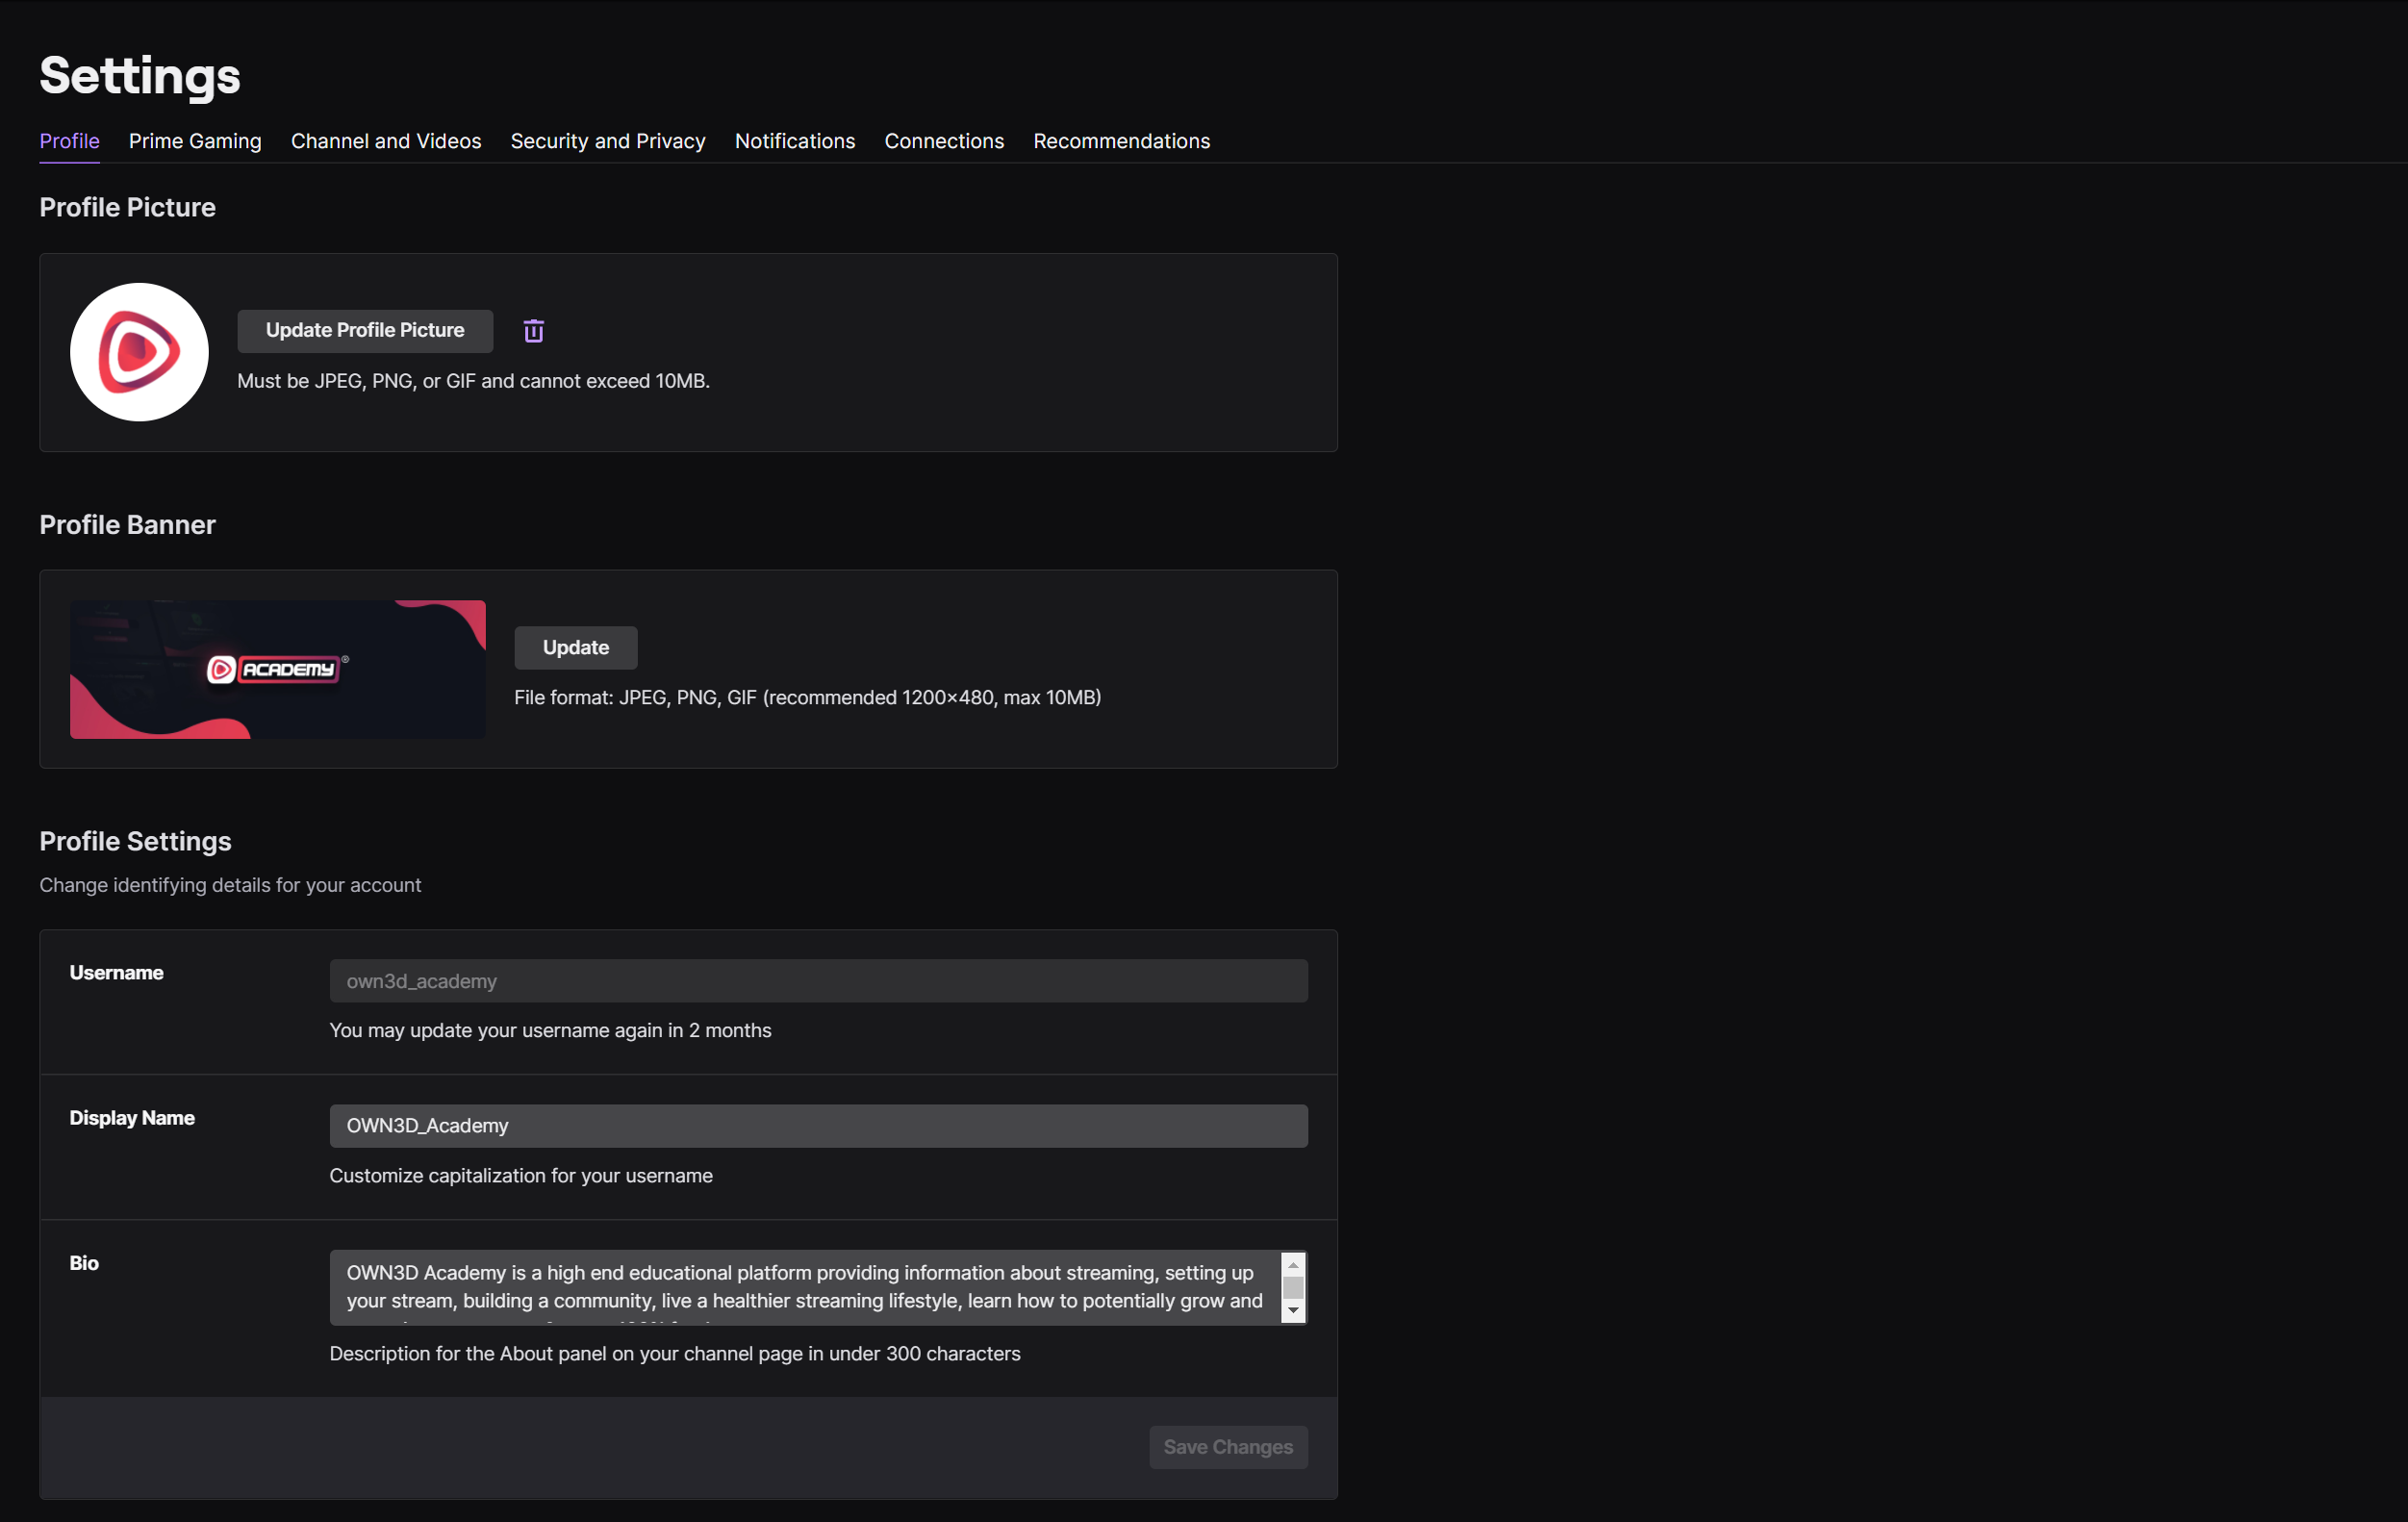
You don't have to sound overly creative, eccentric, or obsessively funny here. With the bio, it's important that the viewer experiences authenticity and gets some initial info about what to expect on your Twitch channel. So write succinctly who you are and what kind of content you deliver. Then a new viewer will know right away what makes you tick. You can go into detail later in the panels.
When setting up, there is also the option to draw attention to other social media channels. To do this, click on "Channel and Videos" in the settings where you just edited the bio. Then scroll down a bit and you'll find the Social Media Links setting. Here, the icons are also automatically adjusted - depending on the link - and you can specify an individual link name, which is then displayed in the profile.


